Spine Service User Death Report
The Spine Service User Death Report (SUDR) shows all deaths that are of interest to a particular organisation.
Overview
The Spine Service User Death Report (SUDR) shows all deaths that are of interest to a particular organisation. For a death to be reported to the organisation, a patient must have been traced on PDS using a Spine-compliant PAS, DBS or NCRS. Tracing adds a digital marker to the patient record, which is picked up by the report for each interested organisation.
A patient can appear on more than one organisation’s report. Any trace against a patient record after a 'death status' has been added will remove the digital marker, which means the patient will not be included in the SUDR for that organisation. The report only provides details of a patient with a death status when the Trust is deemed not to be aware of it. If a trace has already been made, the details for this patient will not be shown.
PDS is notified of the deaths shown on the report within the date parameters entered on the report request screen.
The report shows:
- death information for Informal, Formal or both death statuses
- when a death status has been removed (for example, because a person has been marked as deceased in error)
- when a patient is classed as ‘un-deceased’ or when their death information has changed
If your PAS is Spine or PDS compliant you can directly access PDS to check a patient’s demographic information, including their Death status. This is the recommended approach.
Alternatively, you can use PDS MESH alongside the SUDR to maintain a more accurate view of demographic information within the local PAS.
How to run the Service User Death Report
The Spine 2 Service User Death Report is accessible via the NHS Spine Reporting Service (SRS) using Job Role: Admin & Clerical: Admin and Clerical: Privacy Officer.
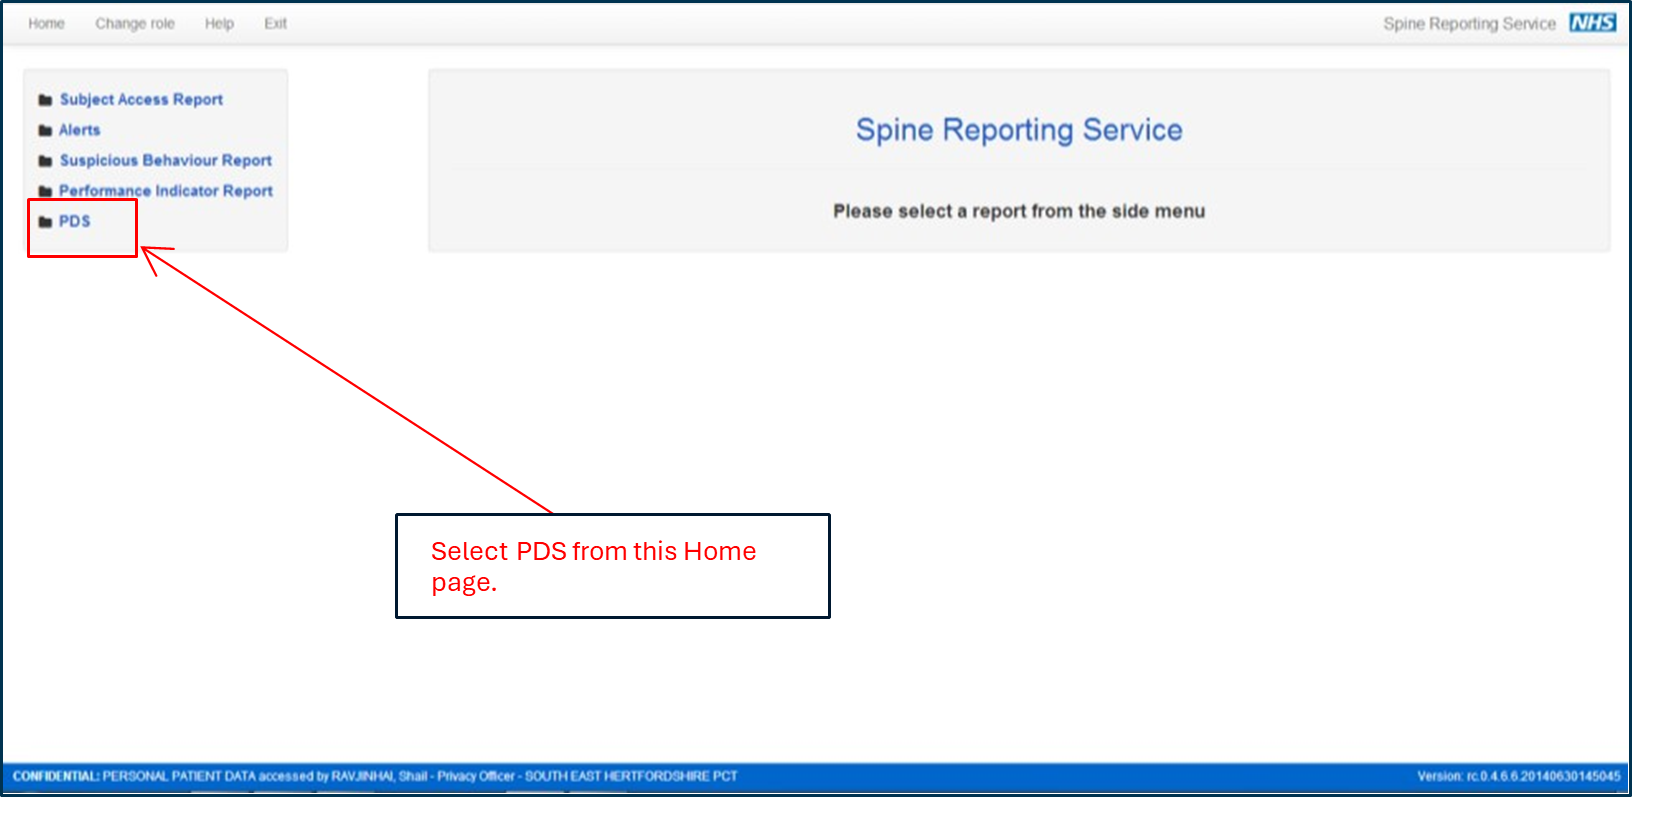
Step 1: select PDS on the left-hand side of the screen view.
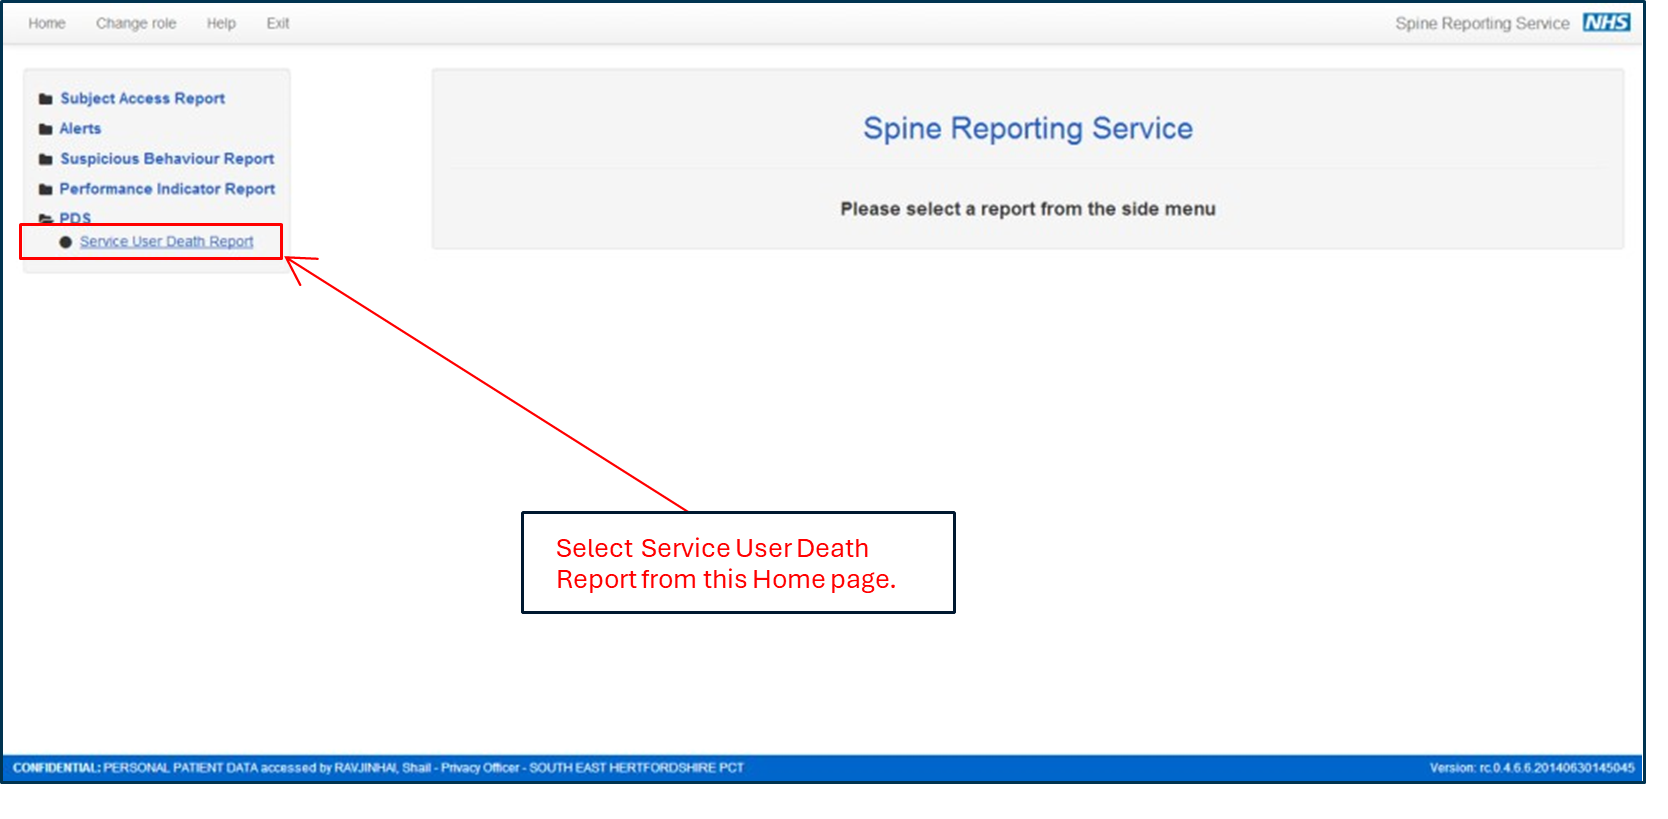
Step 2: select the sub-folder Service User Death Report.
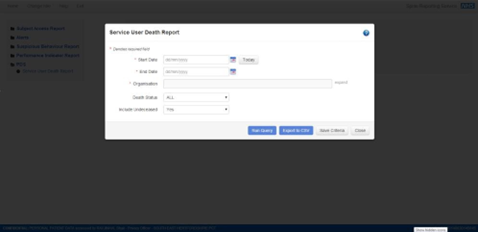
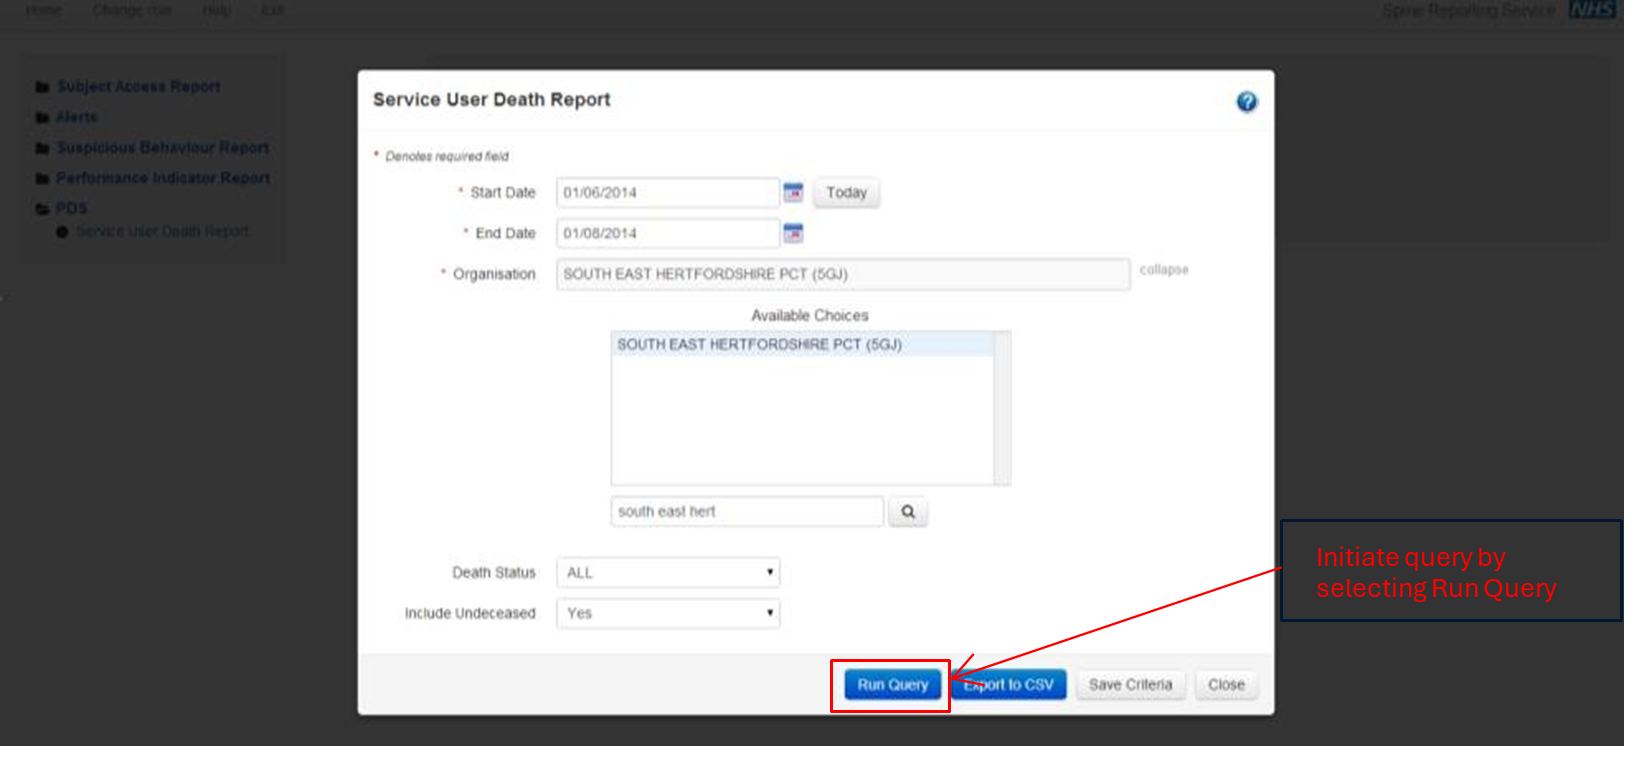
Step 3: a data entry box will appear on screen as illustrated below.
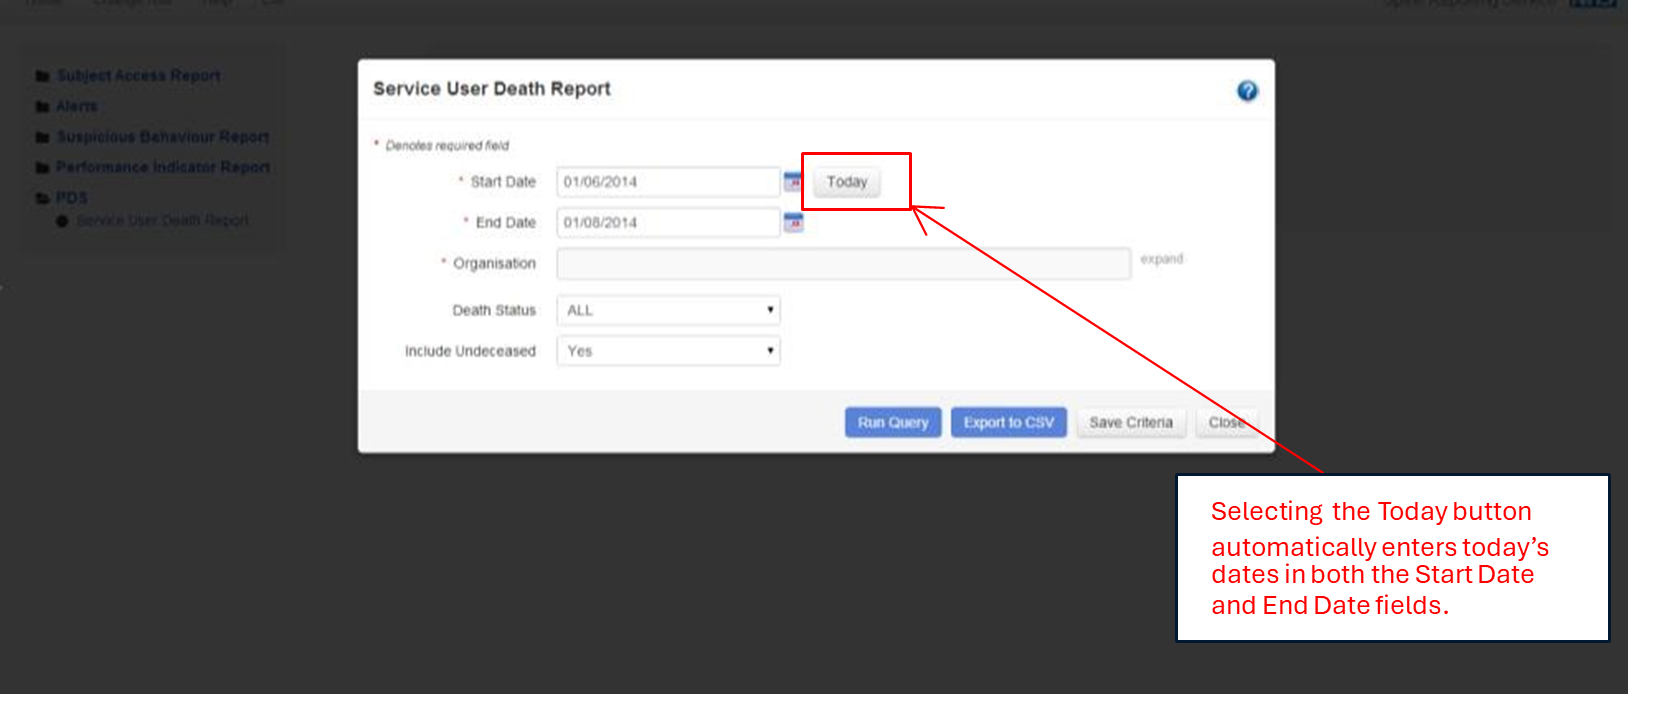
Step 4: enter the search dates into the Start Date and End Date fields. Selecting Today will automatically enter today’s date into both fields. You can add/amend dates to the required parameters by simply inputting the dates or deleting any pre-populated dates and re-entering.
Step 5: to enter your organisation name / code select the expand link.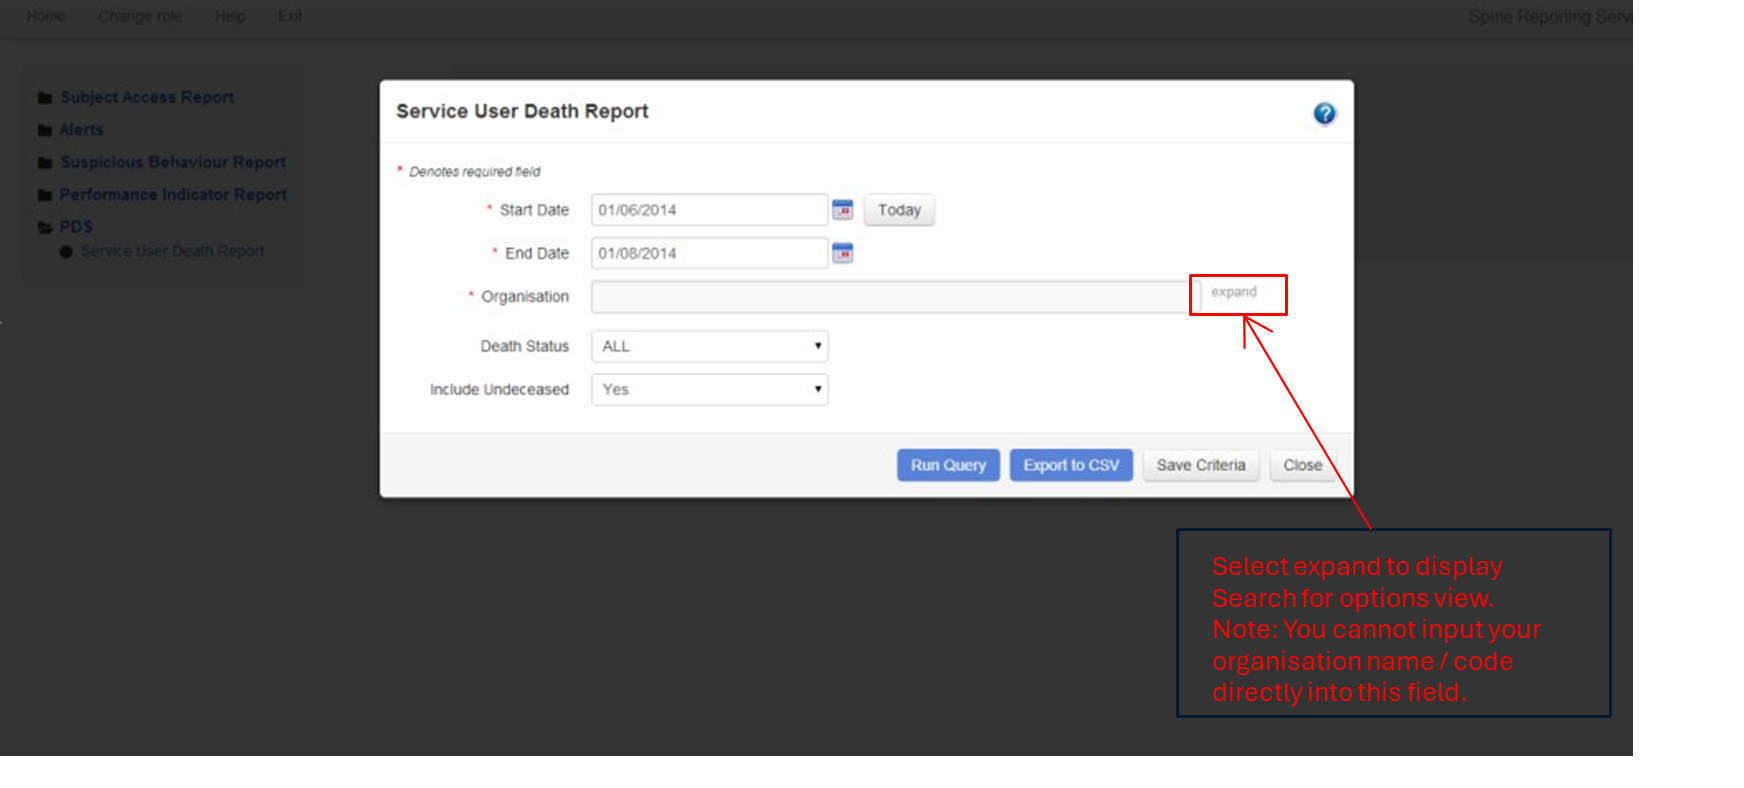
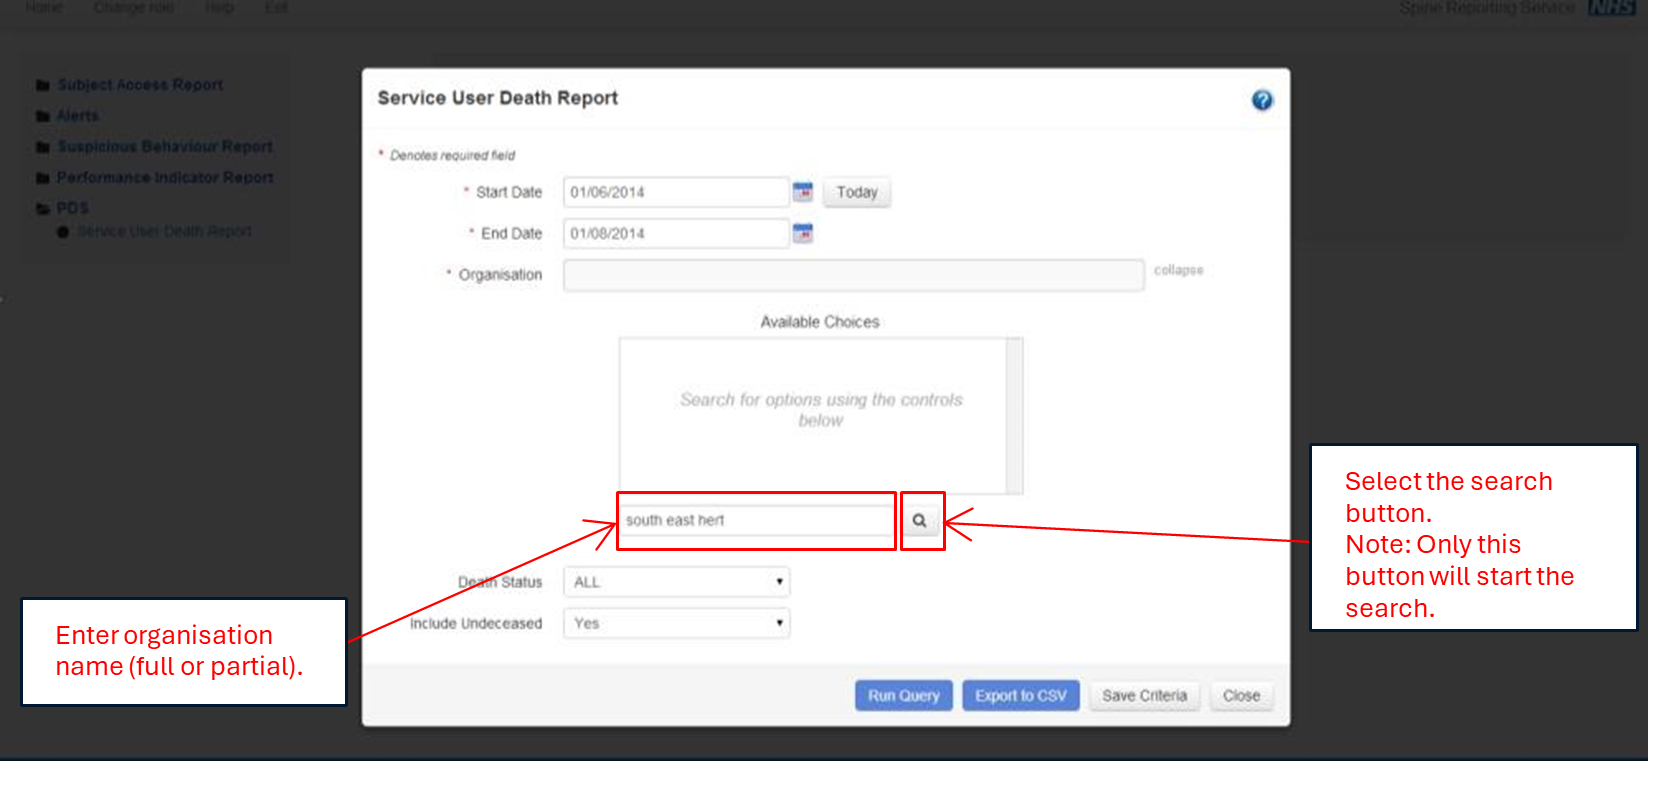
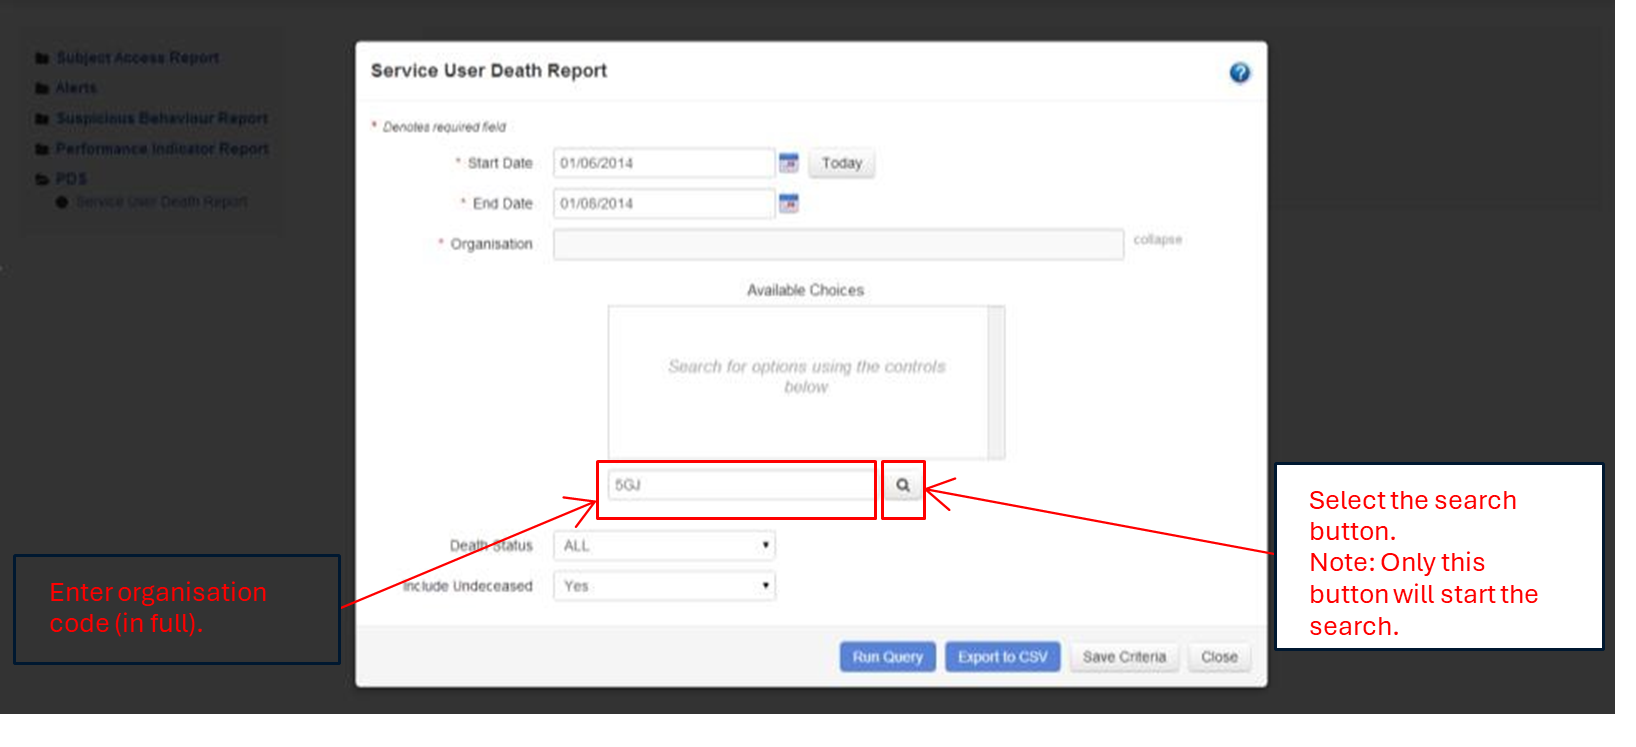
Step 6(b): alternatively, in the search field enter your code in full and then select the search. The search parameters are not case sensitive so can be added in either upper or lower case.
Step 7: the system will display matching organisation(s) based on the information supplied. If your organisation is displayed proceed to the next step. If your organisation is not displayed re-enter data and search again. The organisation look-up usesis performed on the Spine Directory Services (SDS) so all organisations should be present. If your organisation does not appear, follow local procedures for raising a service incident with the National Service Desk.
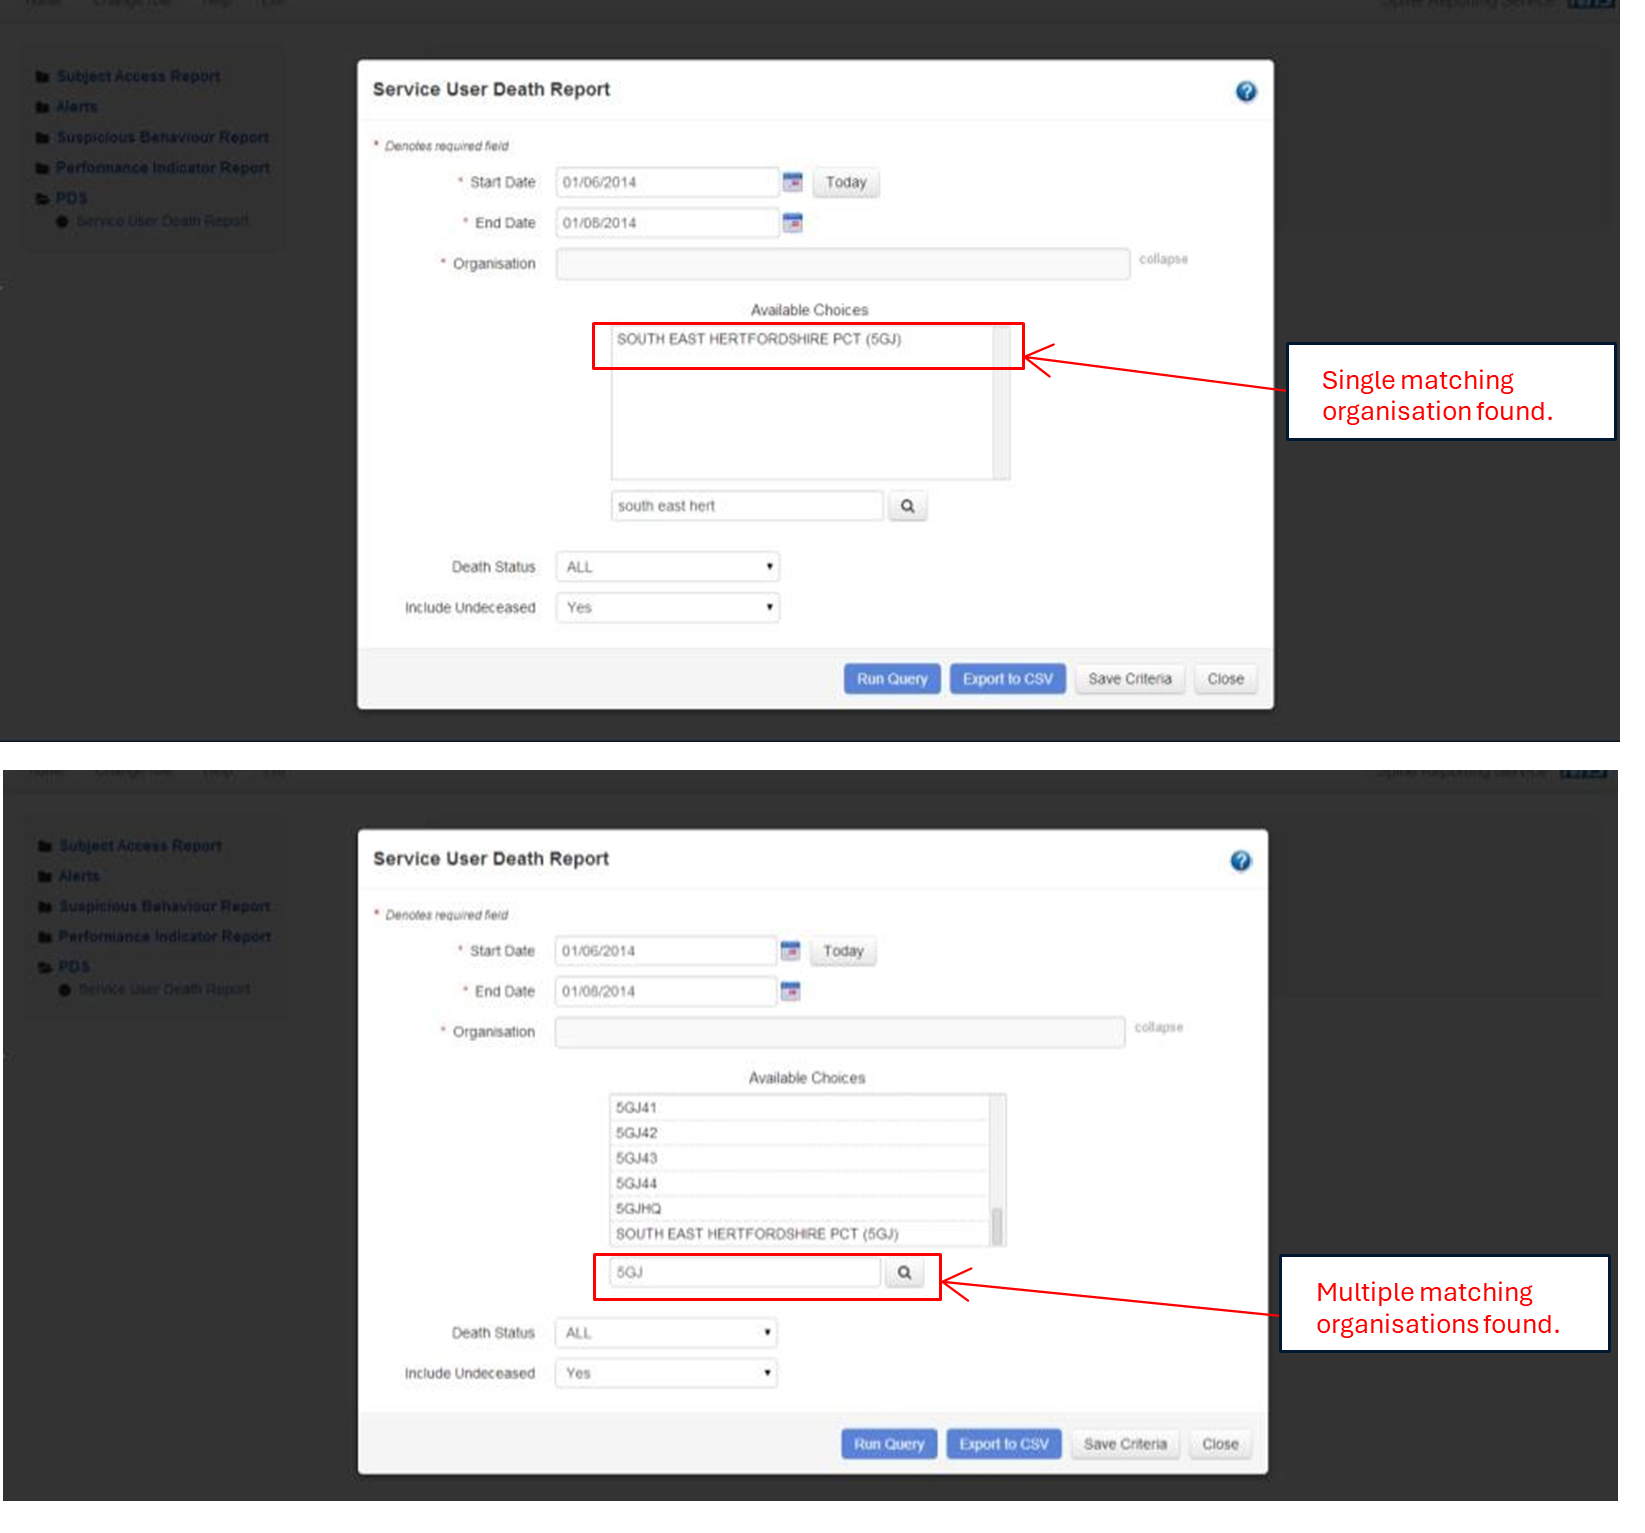
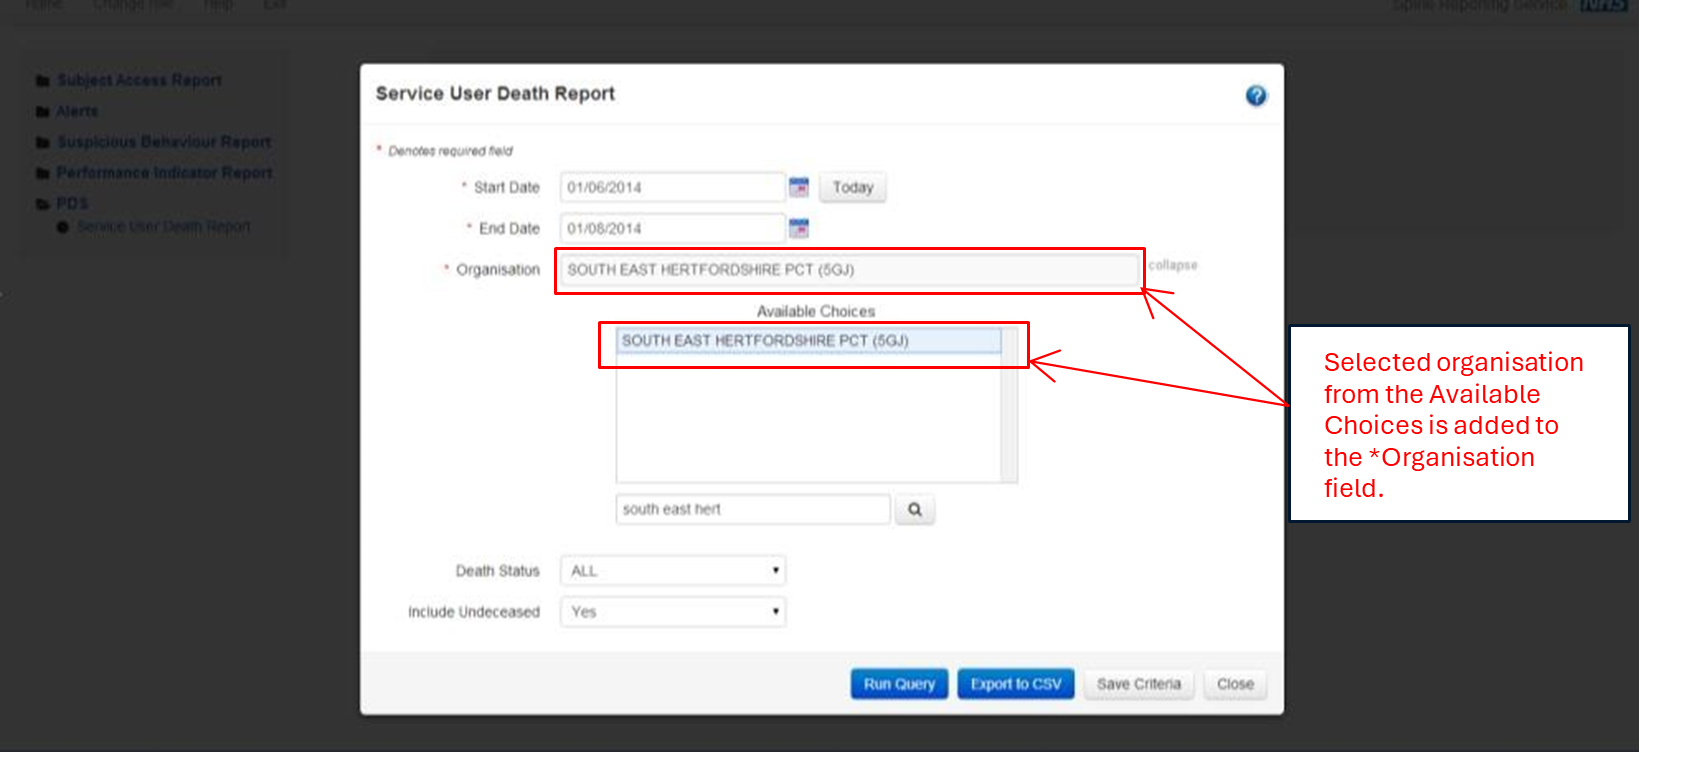
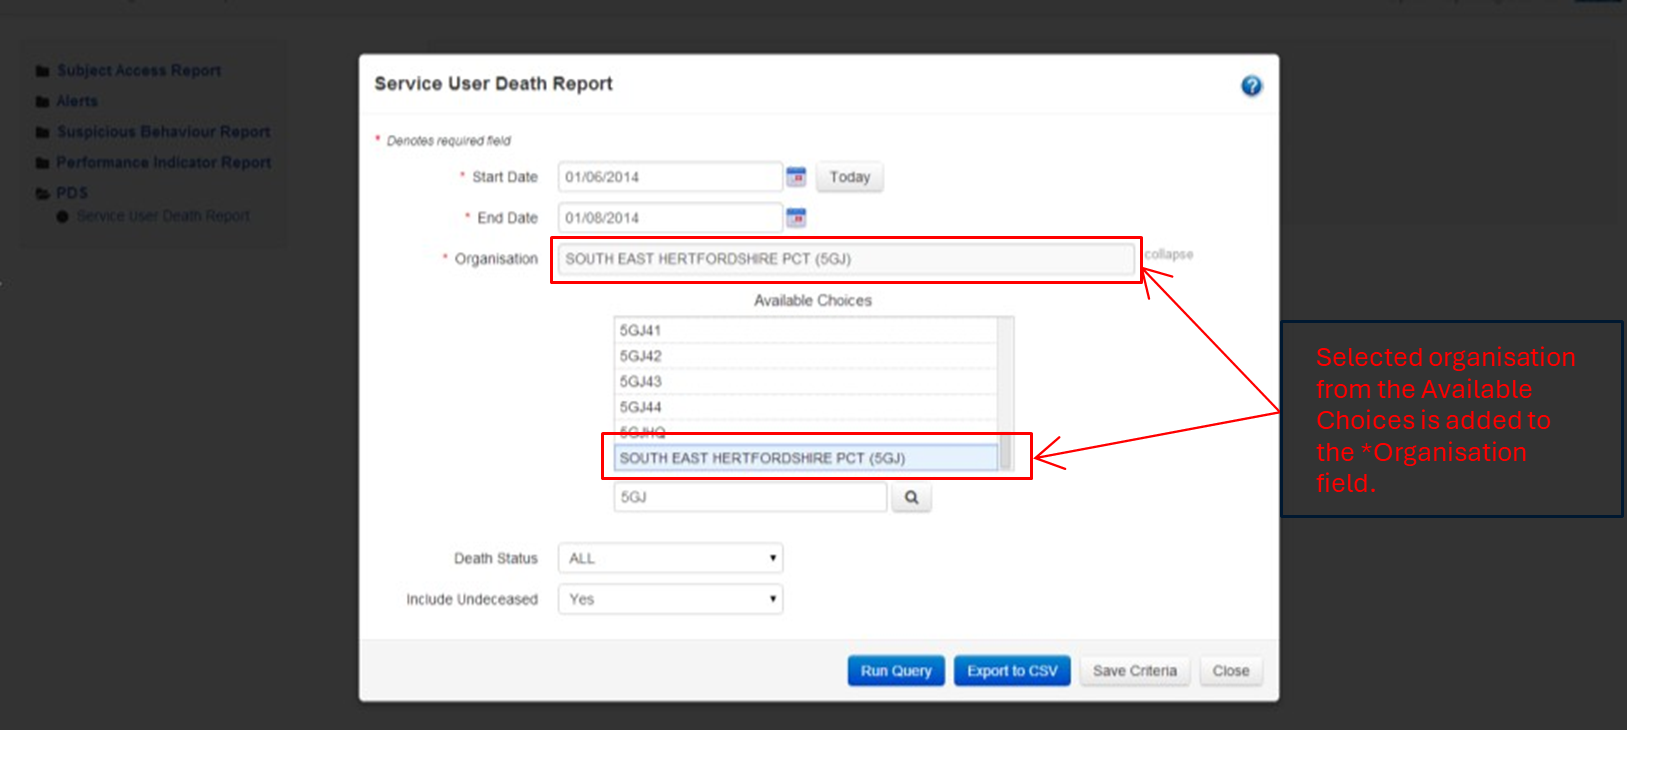
Step 8: click on the required organisation in the Available Choices field. This will automatically populate and present it in the *Organisation field.
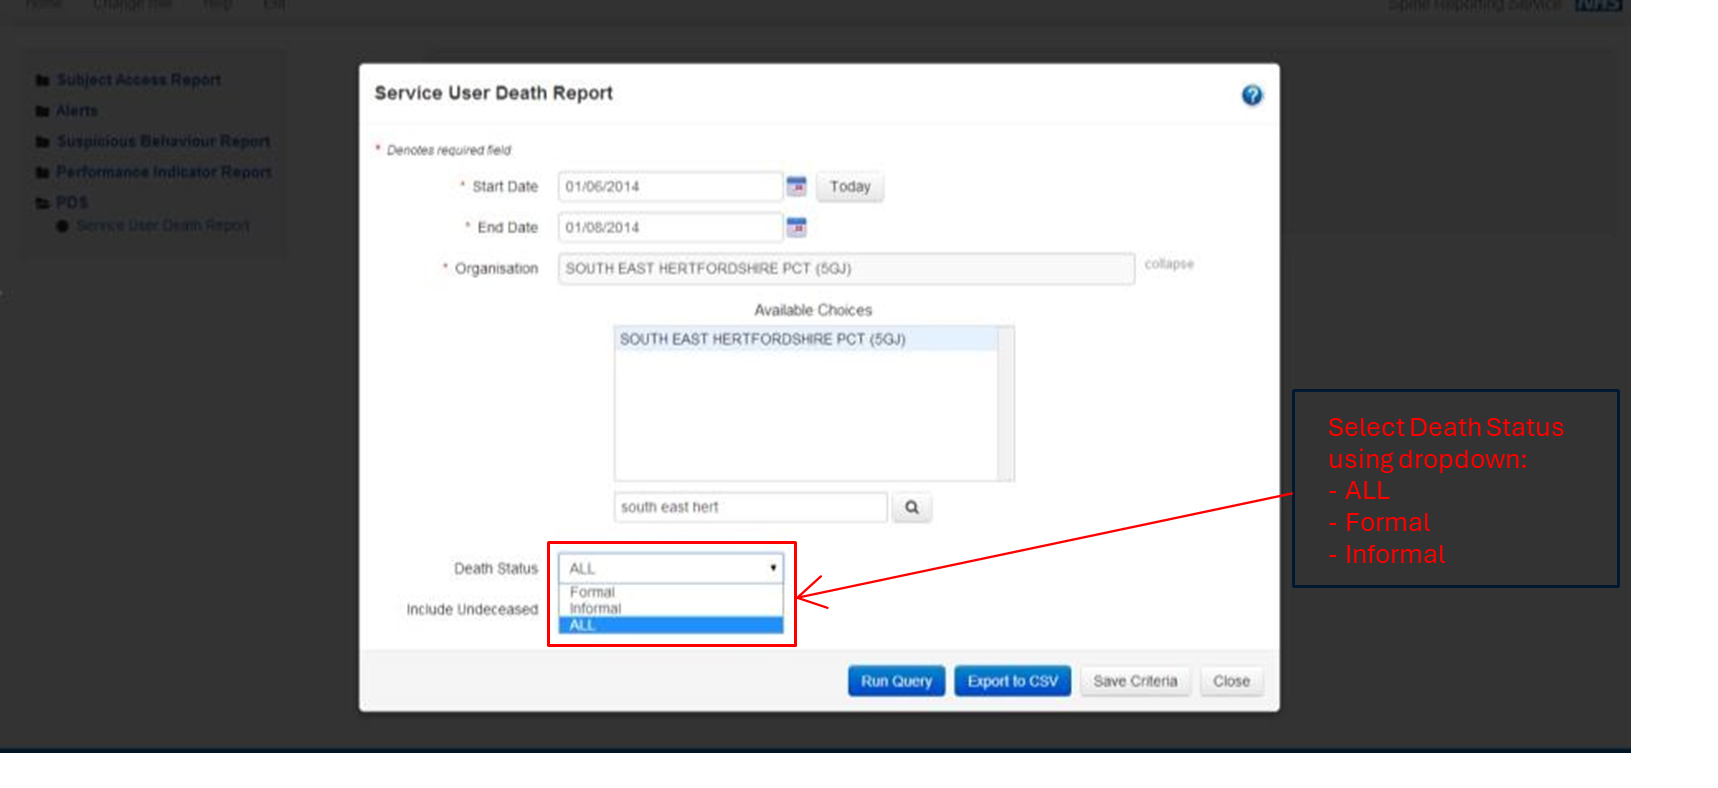
Step 9: select the Death Status you want to find. The default will be ALL but you can choose to select Formal or Informal deaths alone by using the dropdown.
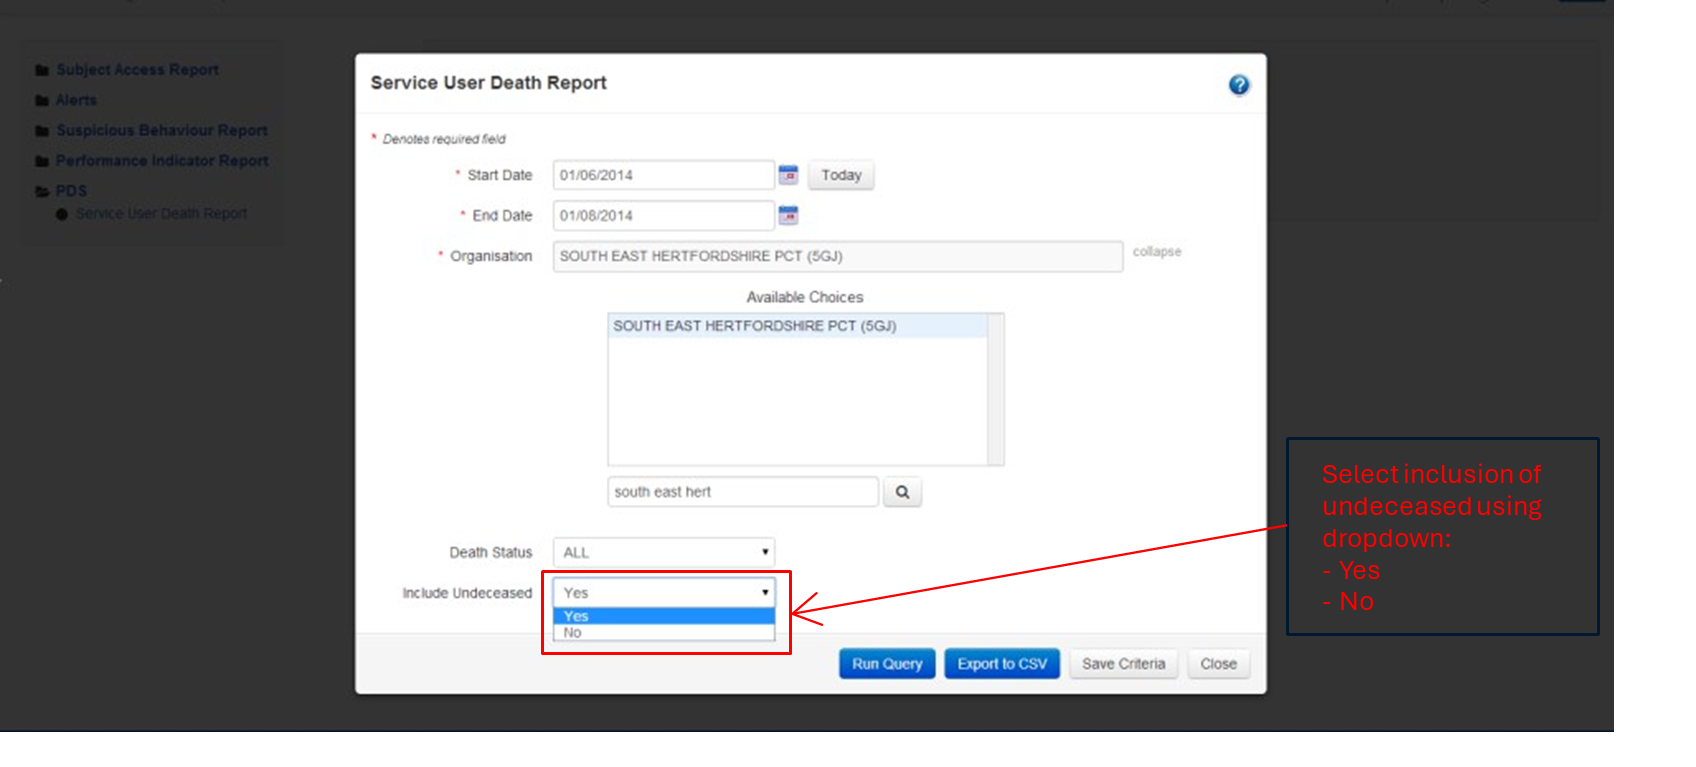
Step 10: the service has been defaulted to Yes - Include Undeceased records in the query. You can change this default from Yes to No by using the dropdown.
Step 11: once all the parameters have been completed, select Run Query.
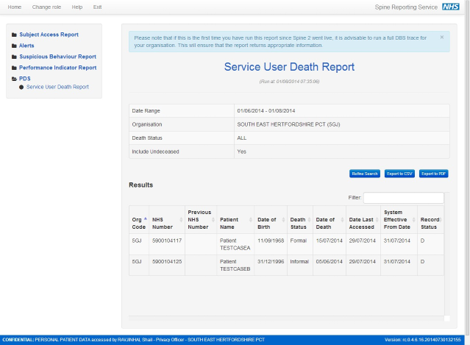
Step 12a: reviewing results of query. The system will display results of all patient records that match the search criteria which have been updated with a Formal or Informal death. The Record Status will be displayed as D (to indicate a death).
Step 12b: reviewing results of query. Where appropriate, the system will also display patient records that have been corrected i.e. previously showing deceased. The Record Status for these patients will be displayed as U (un-deceased).
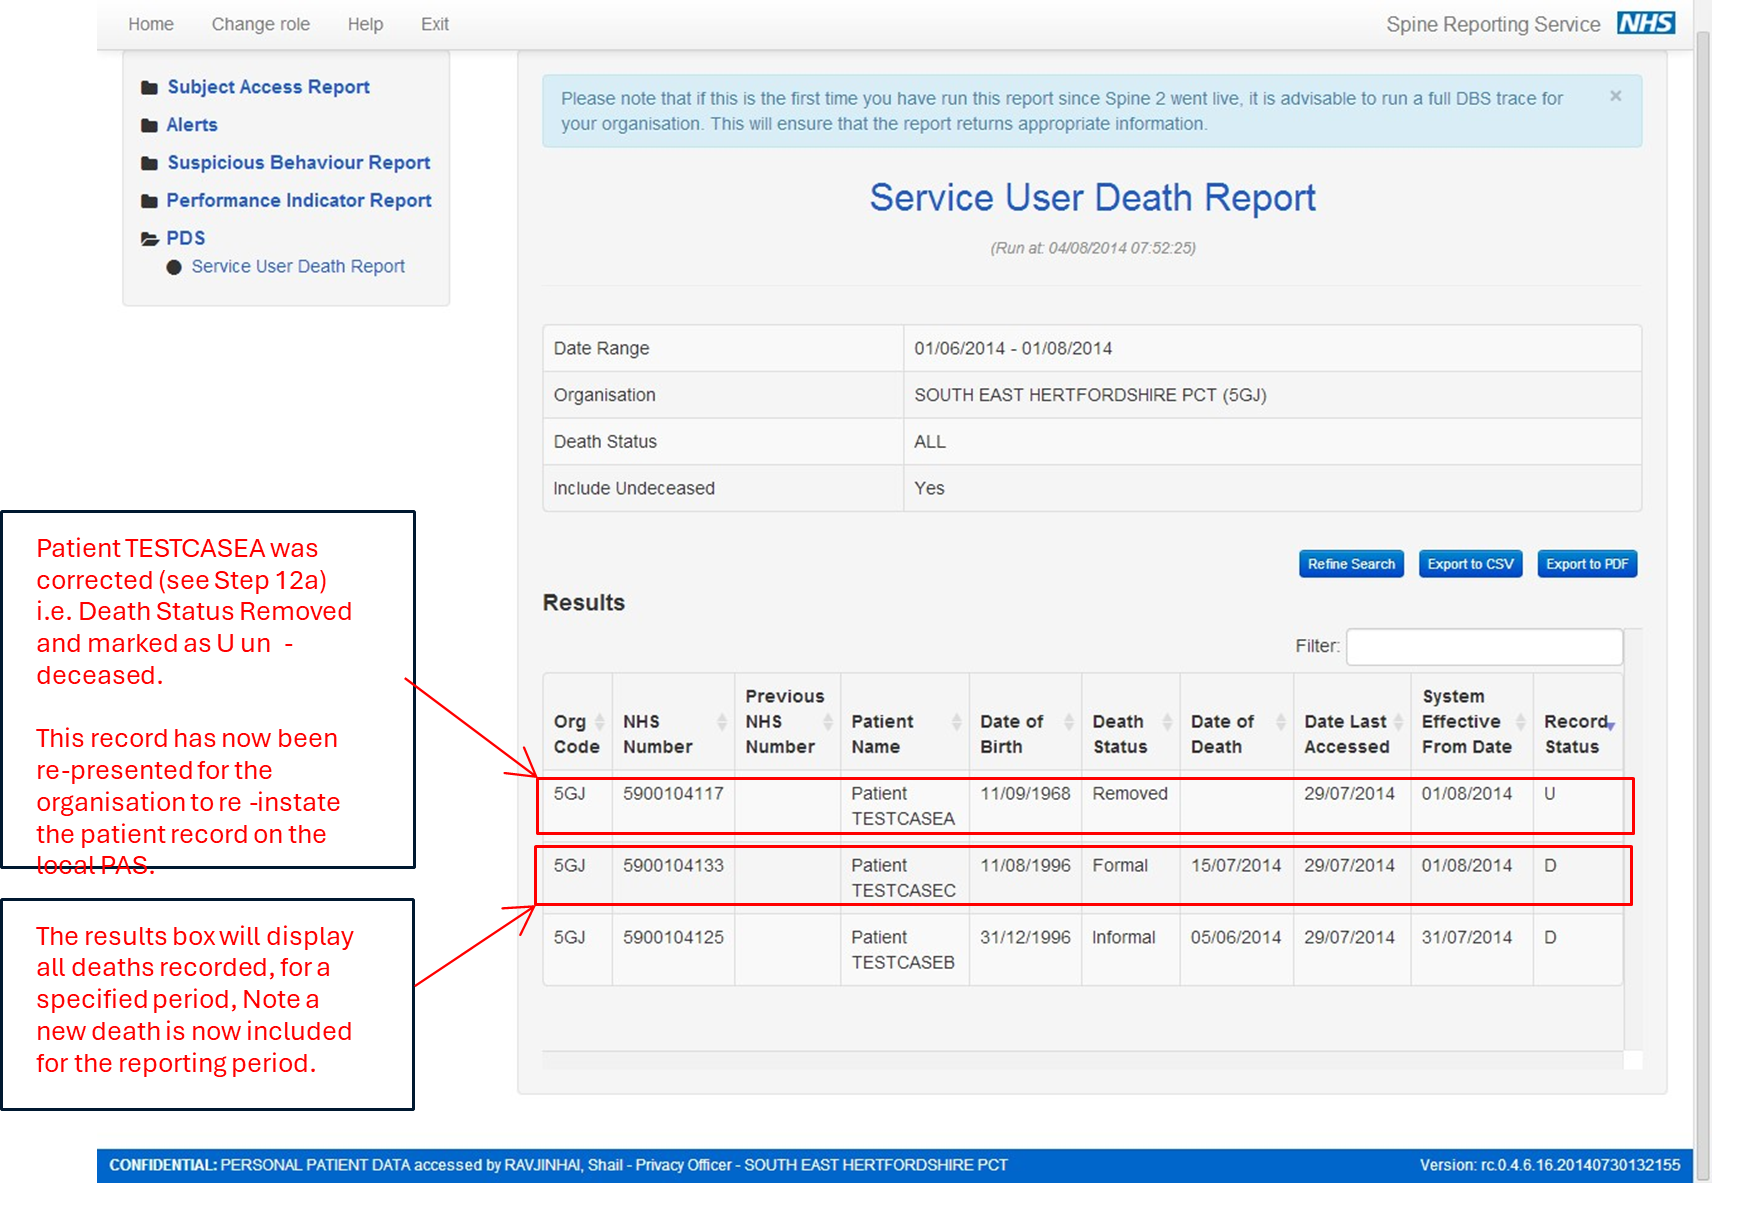
The record status can have the following values and meanings.
|
Status |
Definition |
|
D |
Deceased |
|
C |
Modified (includes a change from Informal to Formal) |
|
U |
Undeceased |
|
UC |
Undeceased Modified (death status was modified prior to being undeceased) |
Last edited: 28 August 2024 10:37 am