Referring a patient - NHS e-Referral Service
A step-by-step guide to referring patients using the NHS e-Referral Service (e-RS). Initiate referrals, attach referral letters, and manage existing referrals.
Initiate a referral and searching for services
If you are referring using the NHS e-Referral Service web-based system, firstly, find the patient by selecting the Patient tab and using one of the three search methods: NHS number, Unique Booking Reference Number (UBRN) or Demographics.
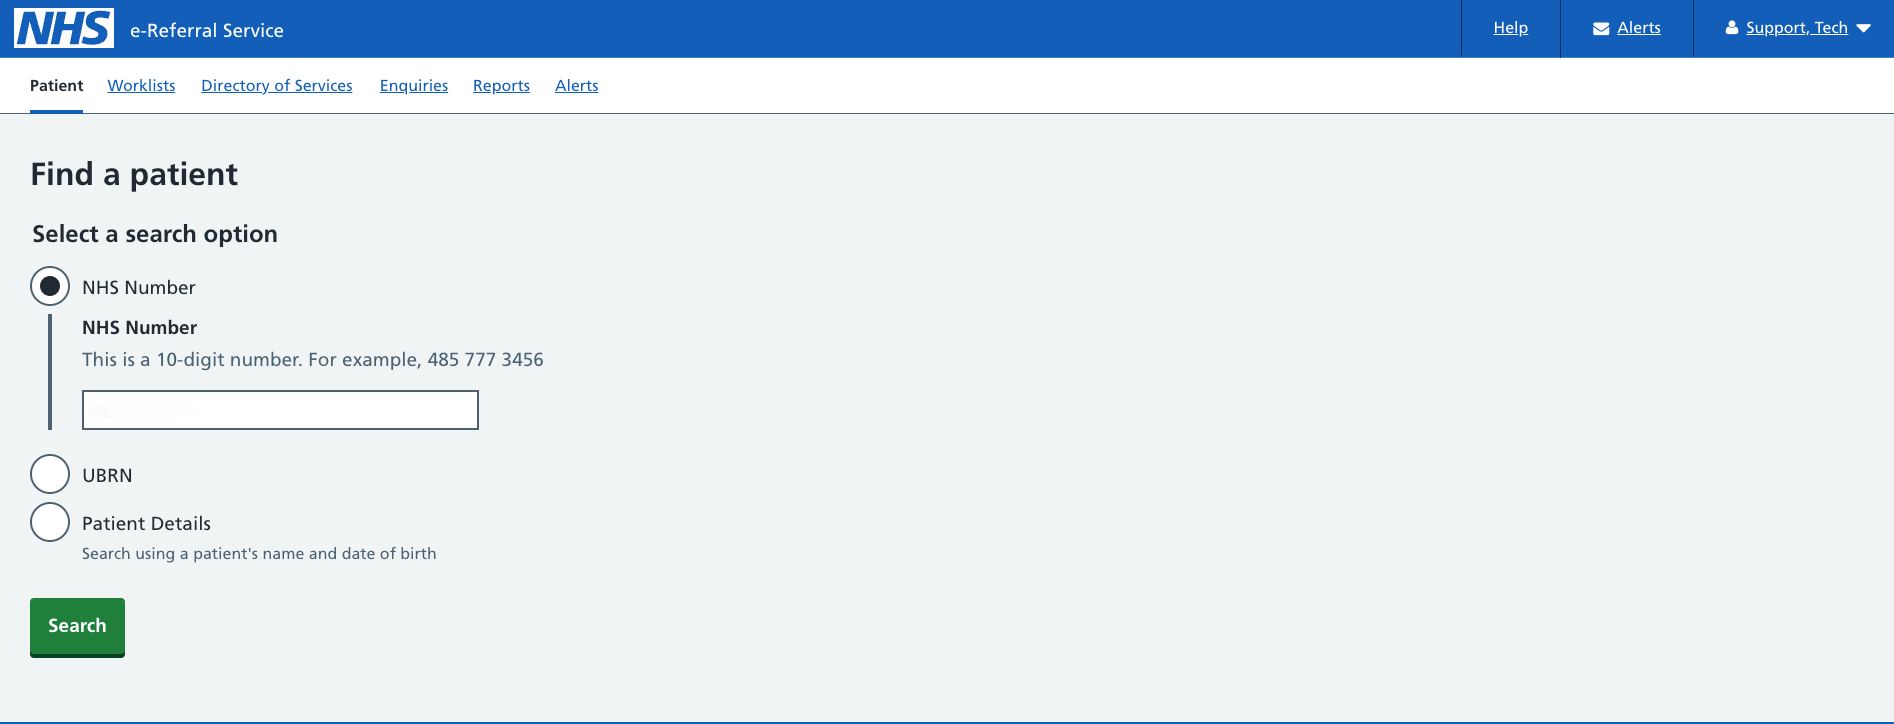
Once you have done this you can refer the patient.
Select 'Refer or seek advice'.
If you are referring using an integrated GP clinical system (such as SystmOne, EMIS, Medicus etc.), start the referral process according to the system’s guidance.
For both methods, you will then reach the 'Search for a service' screen and continue with the referral creation process in the following way:
- If you are logged in as a 'Referring Clinician Admin' you will need to select the 'Referring Clinician'
- Select the 'Referral' option from the request type
- Select an appropriate priority

There are two ways to search for services:

- Open the drop-down list by selecting the 'Specialty' box and selecting the appropriate specialty.
- A 'Clinic type' drop-down will display. Select the correct clinic type.
- Select 'Search' (for locally commissioned and national, consultant-led services).
Speciality and clinic types video (duration 5 minutes) - this video explains how terms are used within e-RS and how referrers can use this field to search for suitable services.

- Select 'Search for a clinician' option under 'Step 2: Select service details' section.
- Enter the surname of the clinician in the 'Last name' field on the 'Search for a clinician' screen.
- Click on 'Search' option (or press 'Return') and the search results will display below the 'Search' option.
- Select the appropriate clinician (or use the other search fields first, to refine your search and then choose 'Search' again).
- When you return to the 'Search for a service' screen, the named clinician selected will display.
- Select 'Search' (for locally commissioned and national, consultant-led services).
Service selection
Click in each checkbox beside the services chosen. 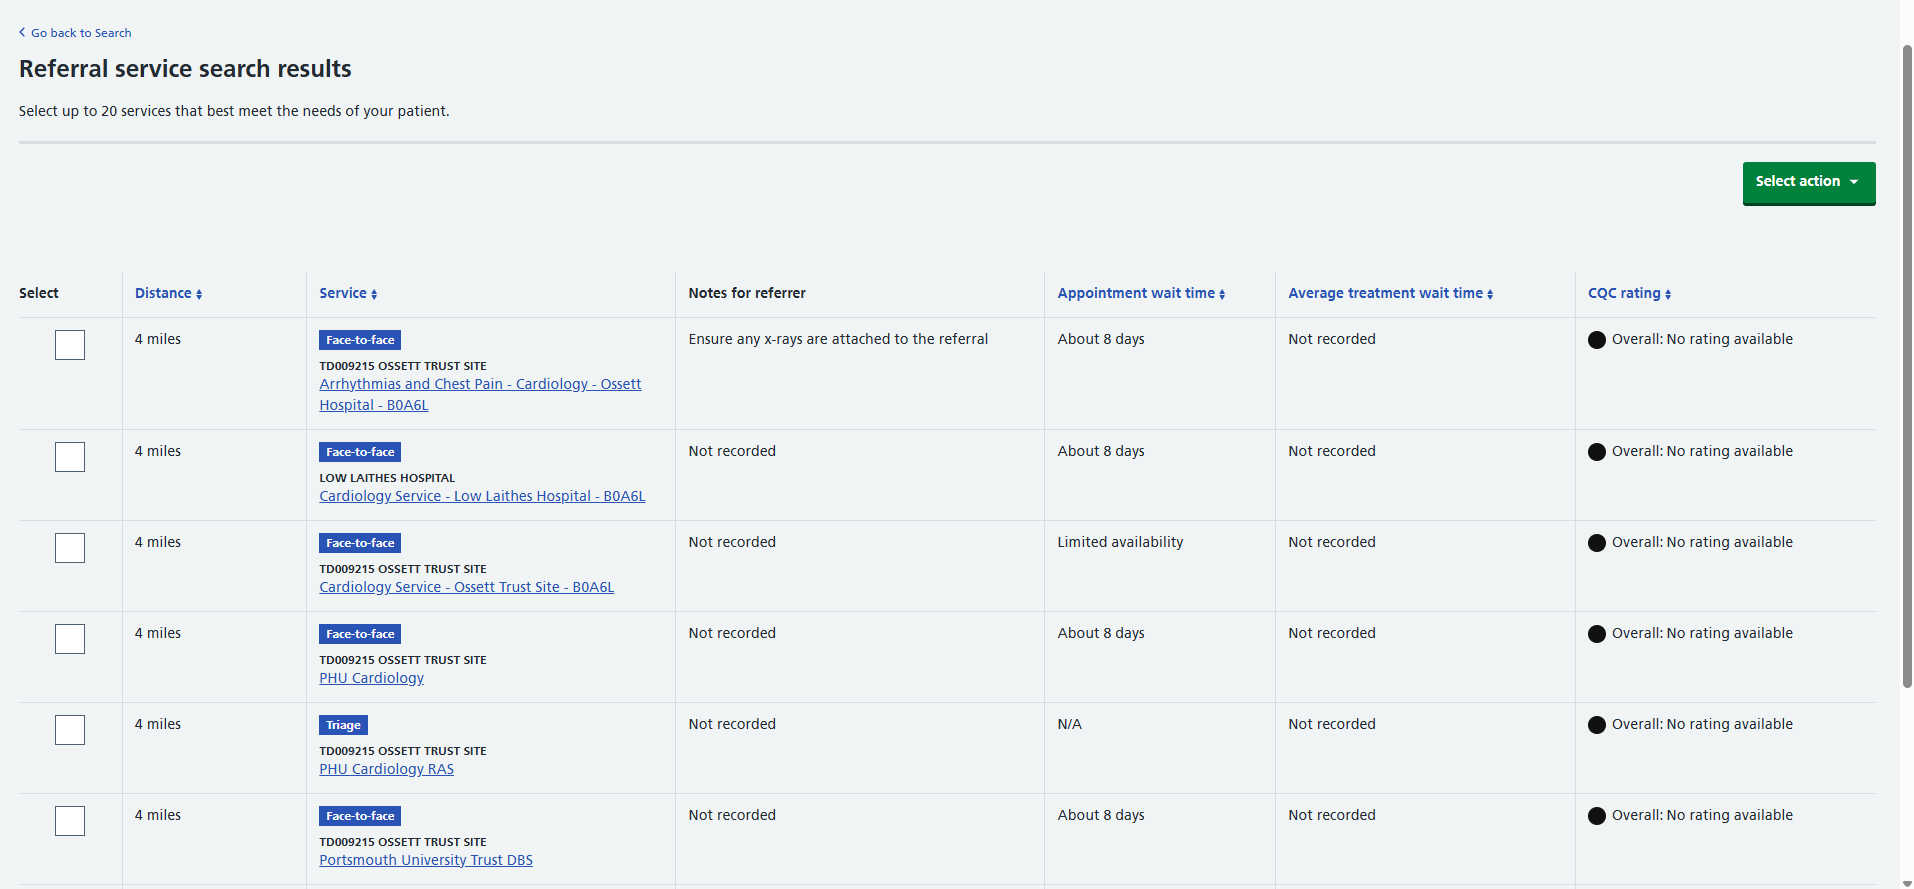
Selecting multiple services or services that are directly bookable will display the 'Select action' button
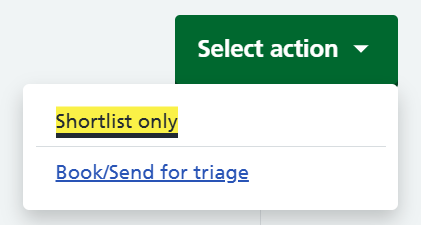
From 'Select action' dropdown you can select either:
- 'Shortlist only' to complete the referral, allowing the patient or their representative to pick a suitable service from the selection at a later stage
- 'Book/Send for triage' if the patient will be choosing a suitable service from the selection now
When only a triage service is selected, a 'Book/Send for triage' button is displayed instead of 'Select action' dropdown.
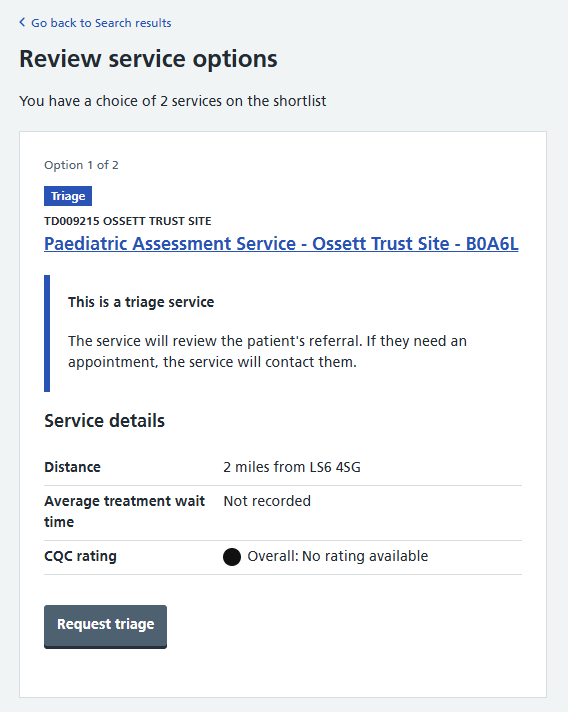
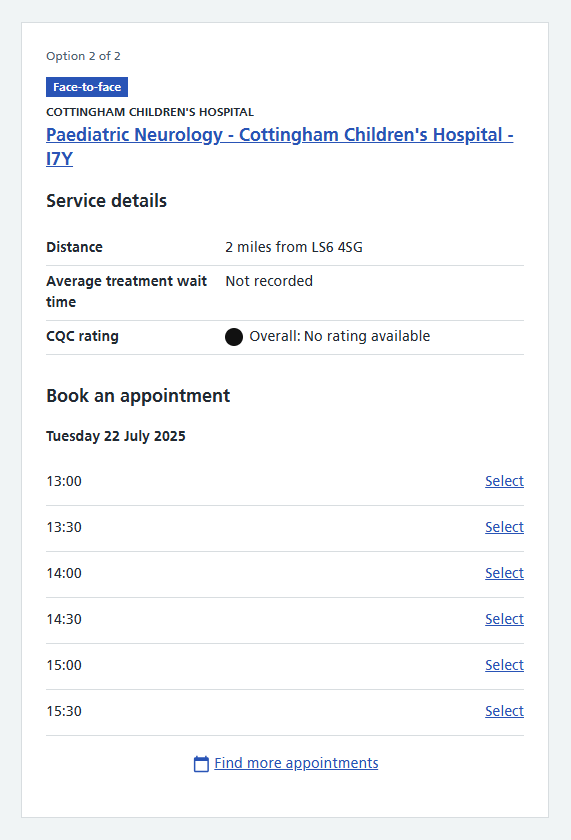
If you choose to book a service using the 'Book/Send for triage' option, the 'Review service options' screen will display for all the chosen services. Each selected service will appear in a card format showing information about each individual service and an option to pick the service. This option might vary from service to service and depends on the type of service.
For example, the 'Request triage' button will show for a Referral Assessment Service (RAS).
If the patient chooses a service offering face-to-face appointments, a suitable appointment can be selected from the earliest available appointments on display or by using the 'Find more appointments' option.
Selecting 'Find more appointments' displays a calendar view showing available dates.
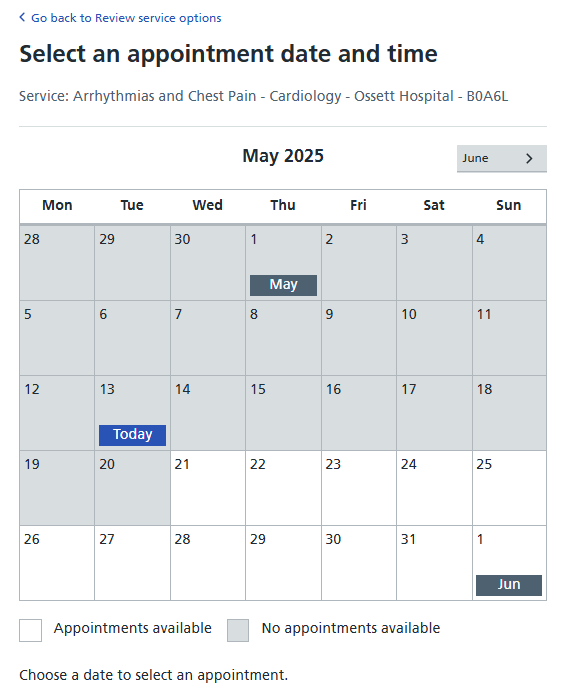
As per patient choice, you can select a suitable date and this will display available times for the day. Selecting a suitable time will display appointment details.
Complete the referral
Once an appointment is selected, the booking details are displayed on a review screen. This is an opportunity to check that all of the referral information is correct.
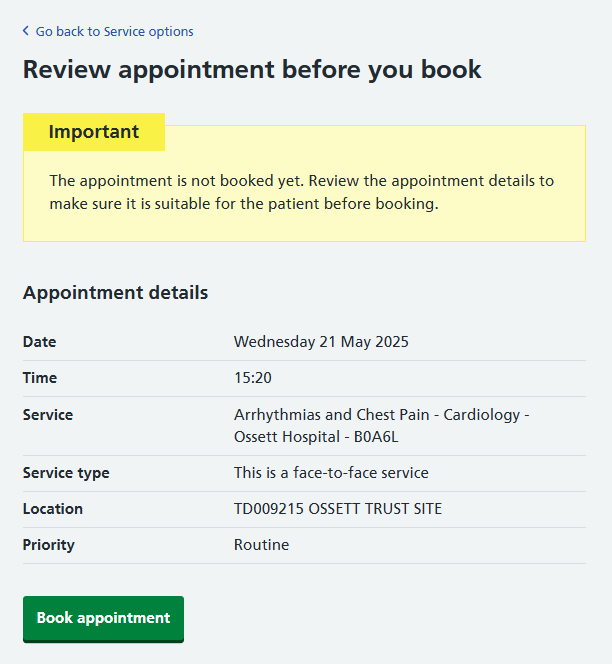
If the information is correct, select 'Book appointment'.
If any of the information is incorrect, you can make changes using the 'Go back to Service options'.
The booking confirmation displays once the appointment has been booked.

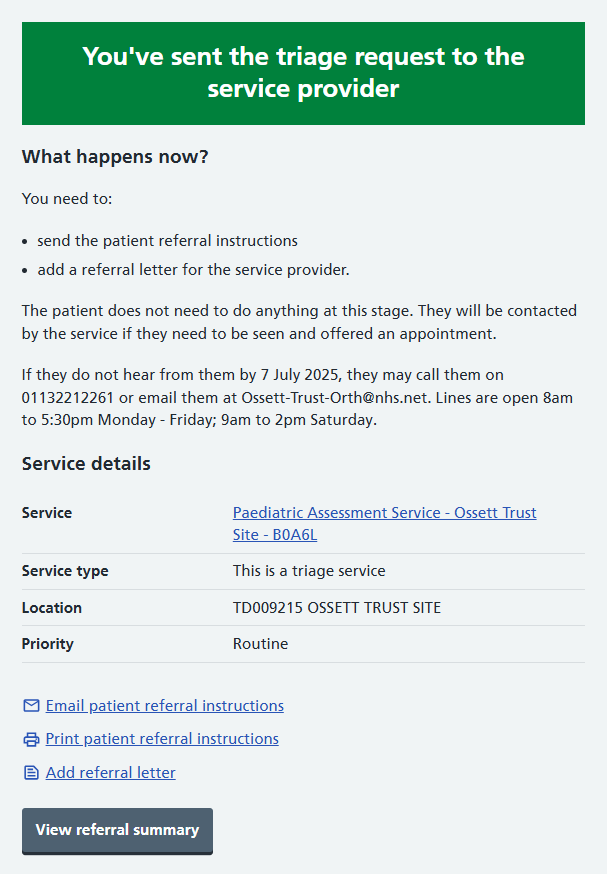
If a triage service was selected, the review details for the triage service will be displayed.
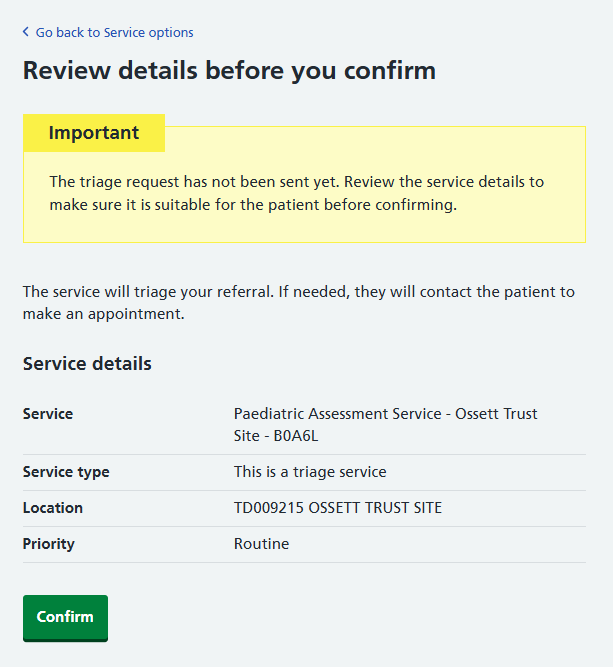
Selecting 'Confirm' will confirm the triage service for patient's referral.
If 'Shortlist only' option is used, the review services screen will show the selected services for shortlist and 'Request referral' button can be selected to confirm and shortlist services.
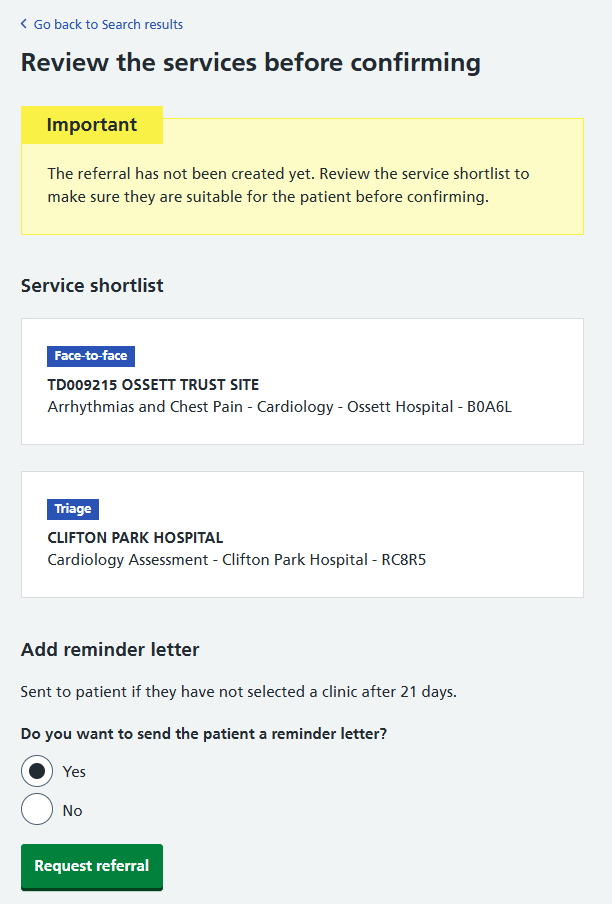
This will display a confirmation informing that shortlisted services are available for patient to review.

From all the above confirmation screens you can:
- print or email the appointment details/referral instructions for the patient (see more information about emailing patient below)
- add a referral letter (where this is required for service selected or services shortlisted)
- view referral summary which offers further options, such as, adding additional requirements where applicable
Adding an additional requirement merely flags to the provider that you feel these are necessary. It does not book them.
Emailing information to the patient
e-RS allow patients* to receive their first outpatient appointment request information via email, instead of (or as well as) the traditional letter. The email informs the patient that their local healthcare service has referred them and allows the patient to easily make their choice and book their appointment online (for example using the Manage your Referral service/NHS App).
This email communication method can also be used to send emails to patients with referrals that:
- require a service to be chosen
- are waiting to be triaged by the chosen provider (referral assessment service)
- are waiting for an appointment to be booked by the chosen provider (referral deferred due to appointments not being available/appointment slot issue)
- have been booked
*Note: the email and NHS App functionality (to manage referrals) is only available for patients that have an NHS Login account with a high level verification at the time their referral was initiated.
Attach a referral letter
If the referral is created directly via an integrated GP clinical system, the referral letter/clinical information can be attached via that system. You will need to check the help information/training materials for that system to learn how to do this.
Attaching a referral letter via the web-based e-RS application can be done in several ways.
Attaching a referral letter as part of the referral process
For a service booked that does not need a referral letter, a section 'Add referral letter' is displayed on the 'Review the services before confirming' screen.
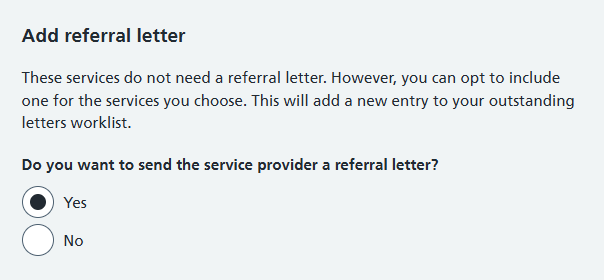
The 'Add referral letter' option will be available where:
- any one or more services shortlisted require a referral letter
- the service booked require a referral letter
- a service does not need a referral letter but an option was selected (as above) to send the service provider a referral letter
Whether you have created a referral by shortlisting services or booked a service for patient's referral, the next step would be to upload the clinical information.
If the referral information is available for upload, ensure this is saved to a secure location. Select the 'Add referral letter' option from the confirmation screen. This will take you to the 'Manage referral attachments' screen.
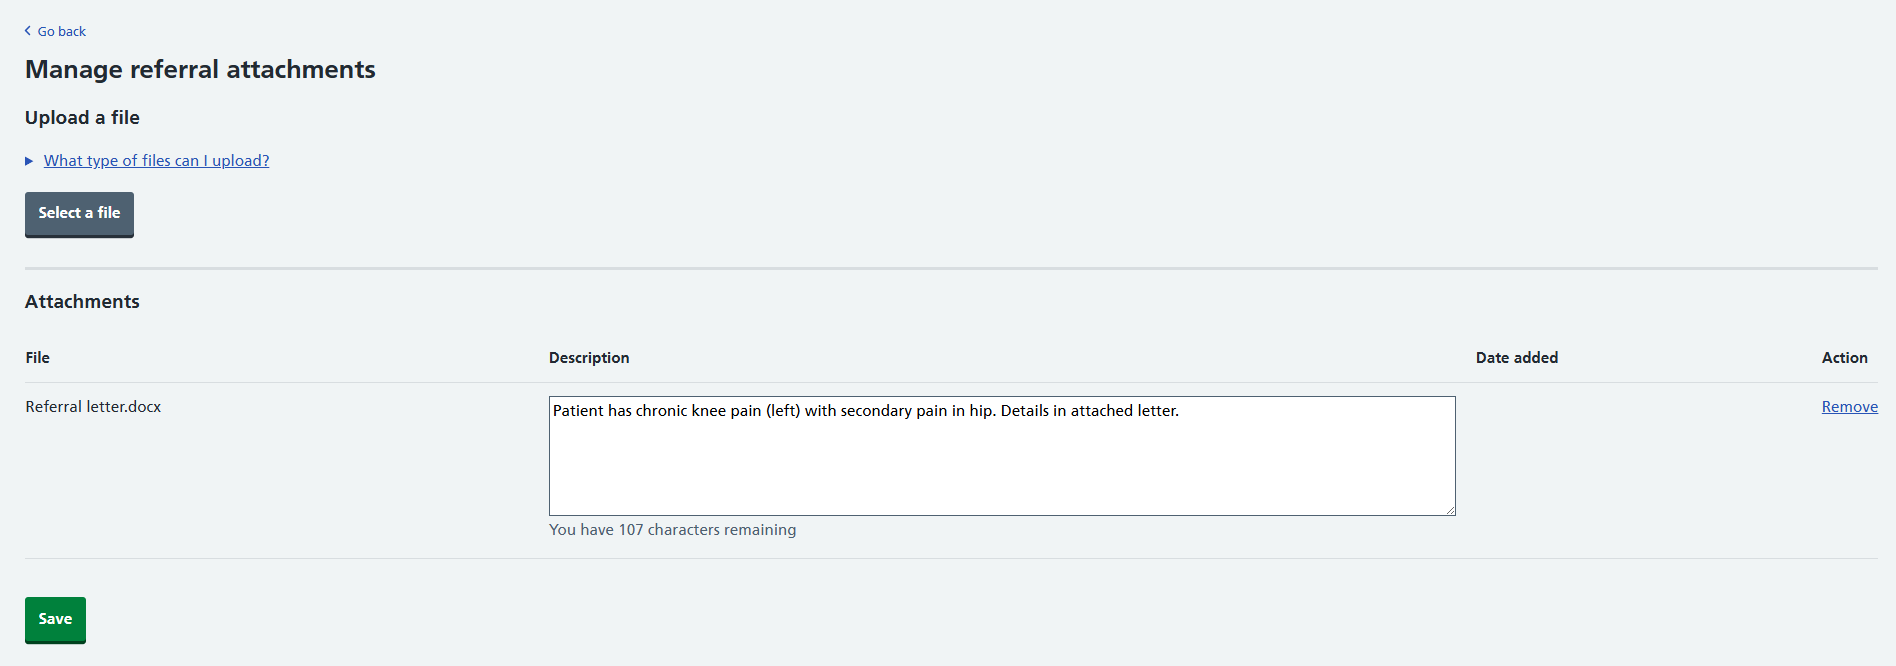
- Click on 'Select a file' button.
- Locate the file saved to a secure location.
- Select 'Open' to attach the file.
- Repeat the steps to add multiple files up to a limit of 5MB each (unlimited number of files permitted) through the web-based e-RS portal and using APIs. If attaching files through GP integrated systems the total size is limited to 5MB.
- Select 'Save'.
The 'Referral summary' screen is displayed with a confirmation of the referral attachments uploaded.
Attaching the referral letter as a separate task
Ensure the referral letter is completed and save to a secure location.
From the Patient activity or 'Missing referral letters' worklist:
- Select the appropriate UBRN.
- From the 'Referral summary screen', select the 'Add referral letter' option from the 'Select action' button (see image below).
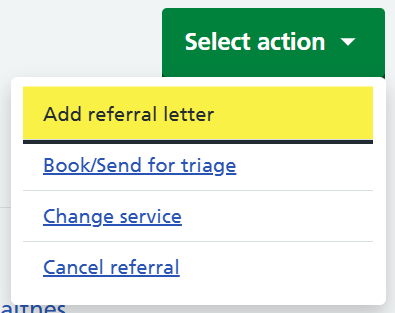
- Select the 'Select a file' button.
- Locate the file saved to a secure location.
- Select 'Open' to attach the file.
- Repeat the steps to add multiple files up to a limit of 5MB each (unlimited number of files permitted) through the web-based e-RS portal and using APIs. If attaching files through GP integrated systems the total size is limited to 5MB.
- Select 'Save' to complete the action and return to the 'Referral summary screen'.
Suitable file types and file sizes
Suitable file types for referral attachments are:
- Plain Text (text/plain) - .txt
- PDF (application/pdf) - .pdf
- XML Text (text/xml) - .xml
- XML (application/xml) - .xml
- RTF Text (text/rtf) - .rtf, .rtx
- Basic Audio (audio/basic) - .au
- MPEG audio layer 3 (audio/mpeg) - .mp3
- PNG Image (image/png) - .png
- GIF Image (image/gif) - .gif
- JPEG Image (image/jpeg) - .jpg, .jpe, .jpeg
- TIFF Image (image/tiff) - .tif, .tiff
- MPEG Video (video/mpeg) - .mpg, .mpeg, .mpe
- MSWORD (application/msword) - .doc
- MSWORD (application/vnd.openxmlformats-officedocument.wordprocessingml.document) - .docx
- DICOM (text/dcm) - .dcm
If there are any queries about attachment file type, check the above and ask the Service Provider’s IT department to allow it within their organisation.
To convert file types which are not support by e-RS please refer to the 'Attachments - converting files to formats' guidance.
Multiple files up to a limit of 5MB each (unlimited number of files permitted) through the web-based e-RS portal and using APIs. If attaching files through GP integrated systems the total size is limited to 5Mb.
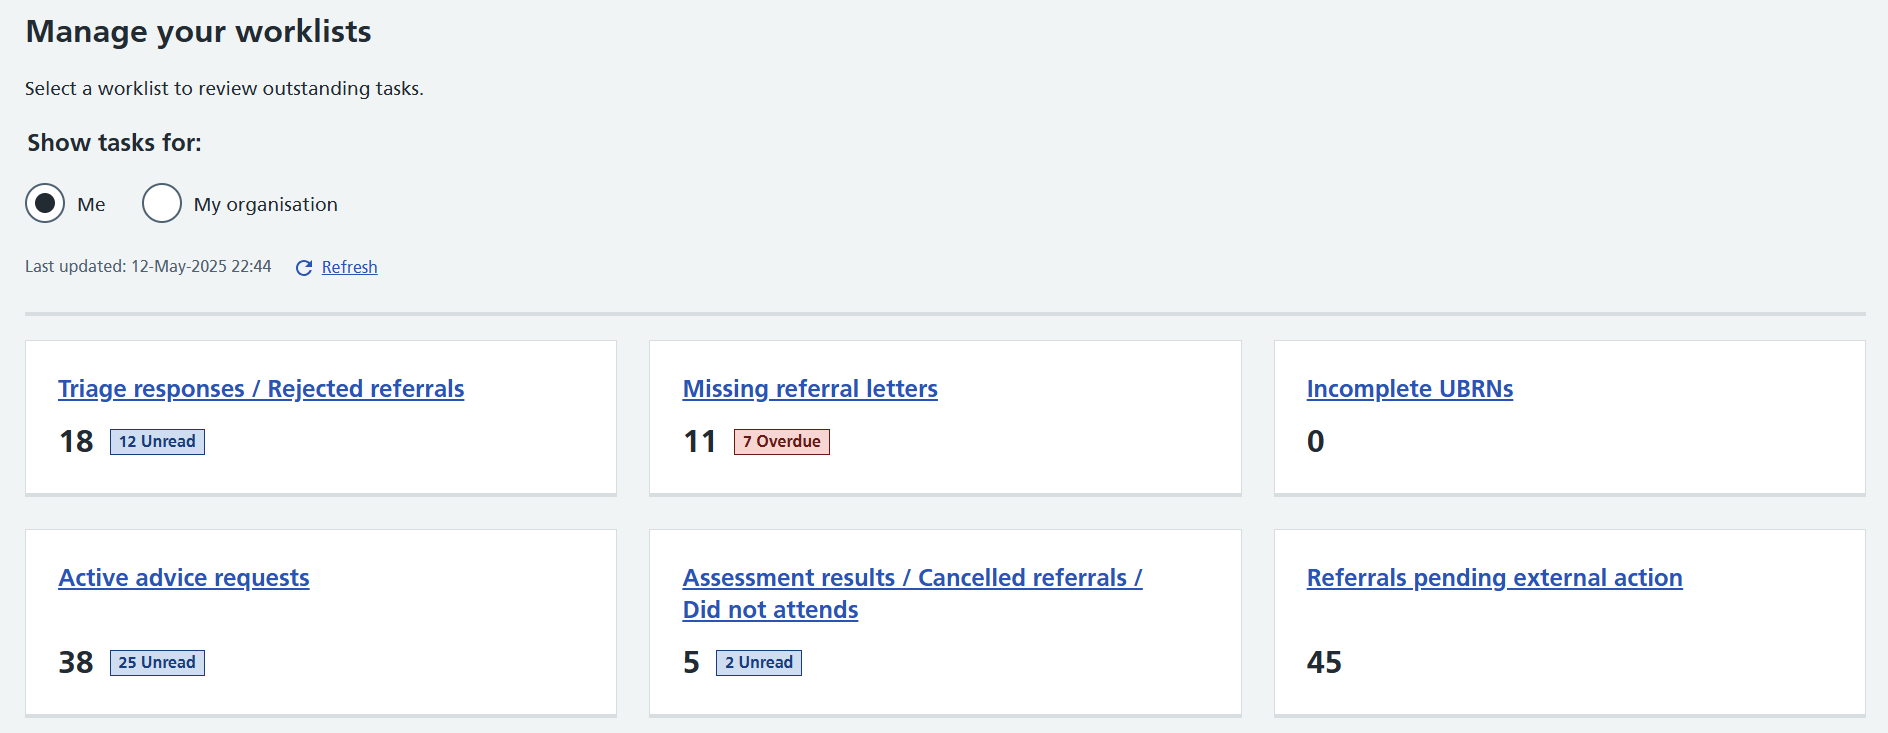
Managing worklists
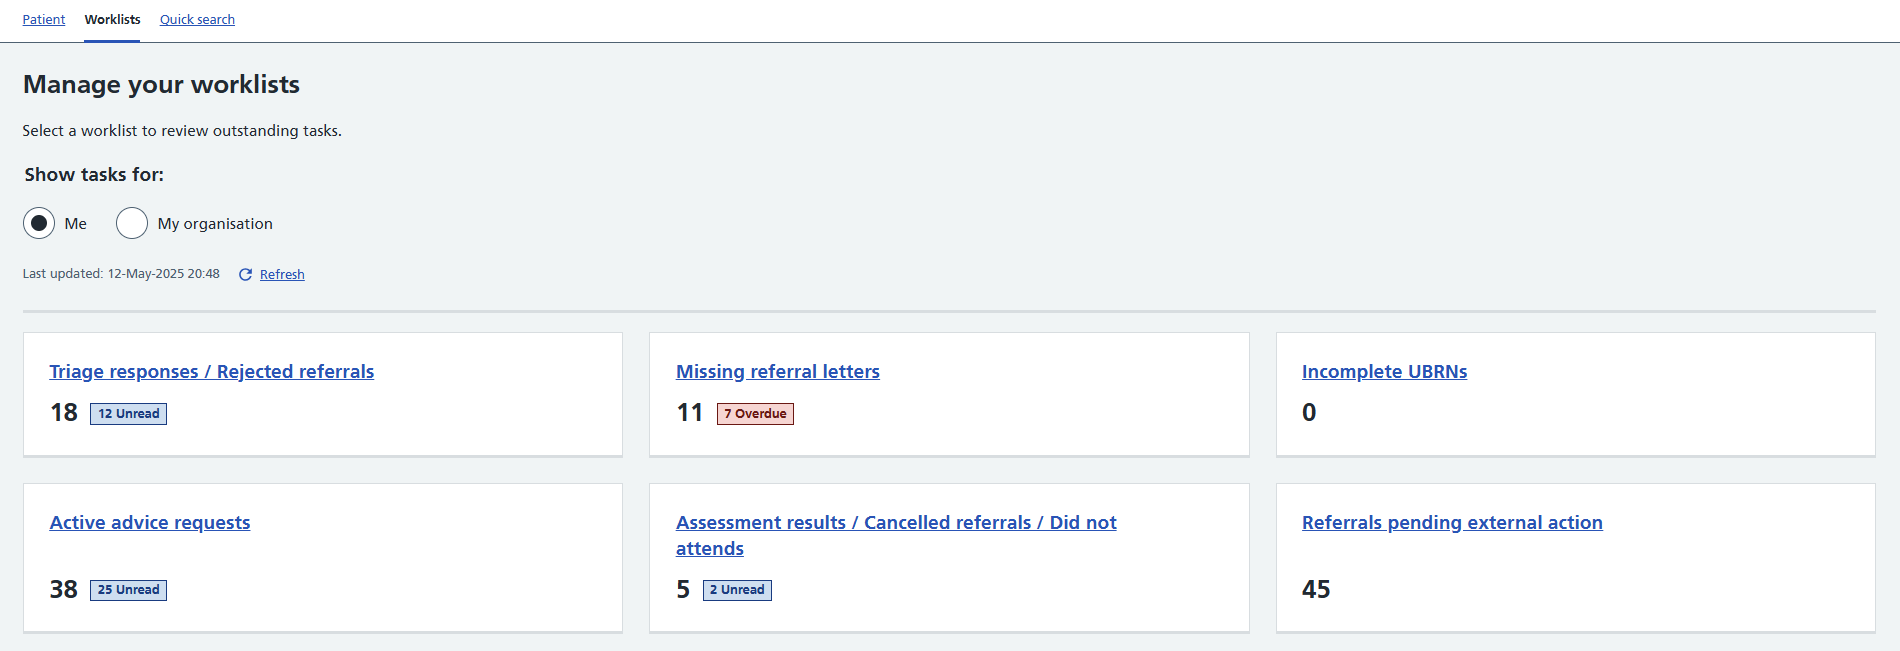
Each worklist must be reviewed and acted upon appropriately. The actions available for each referral will depend on the referral’s history. When an initial referring user accesses the worklist tab they will be presented with a dashboard type format.
At the top of the screen, the ‘Show tasks for:’ information line will only be displayed to referring clinician users. Other referring users will not see these options.
The ‘Show tasks for:’ radio button will be automatically defaulted to ‘Me’ on entering the worklist tab.
This means the referring clinician will see referrals in the worklists for which they are the referrer for the organisation they have logged in under.
Changing the radio button to show referrals for ‘My organisation’, will display the total number of referrals in the worklist for the organisation the user has logged in under.
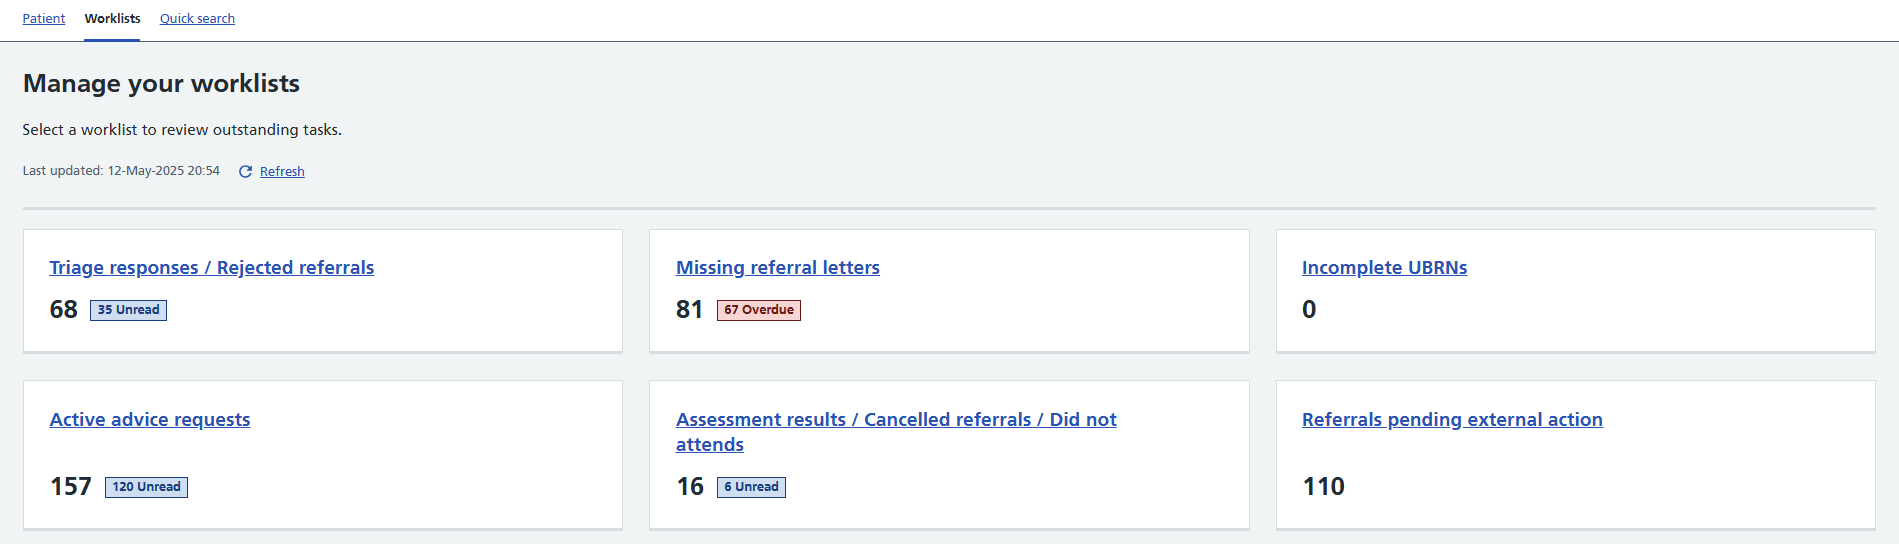
Users will have six worklists tiles presented.
All worklists should be monitored regularly.
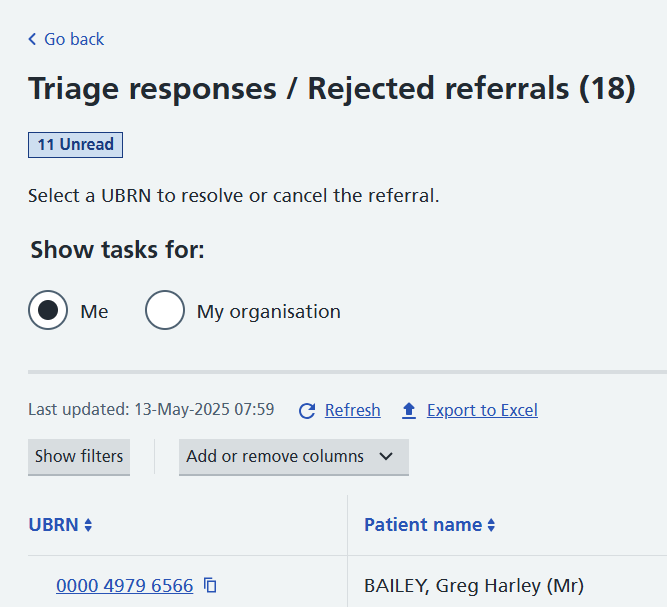
When you select a specific worklist, the worklist name is displayed at the top, with the total count of UBRNs shown in brackets.
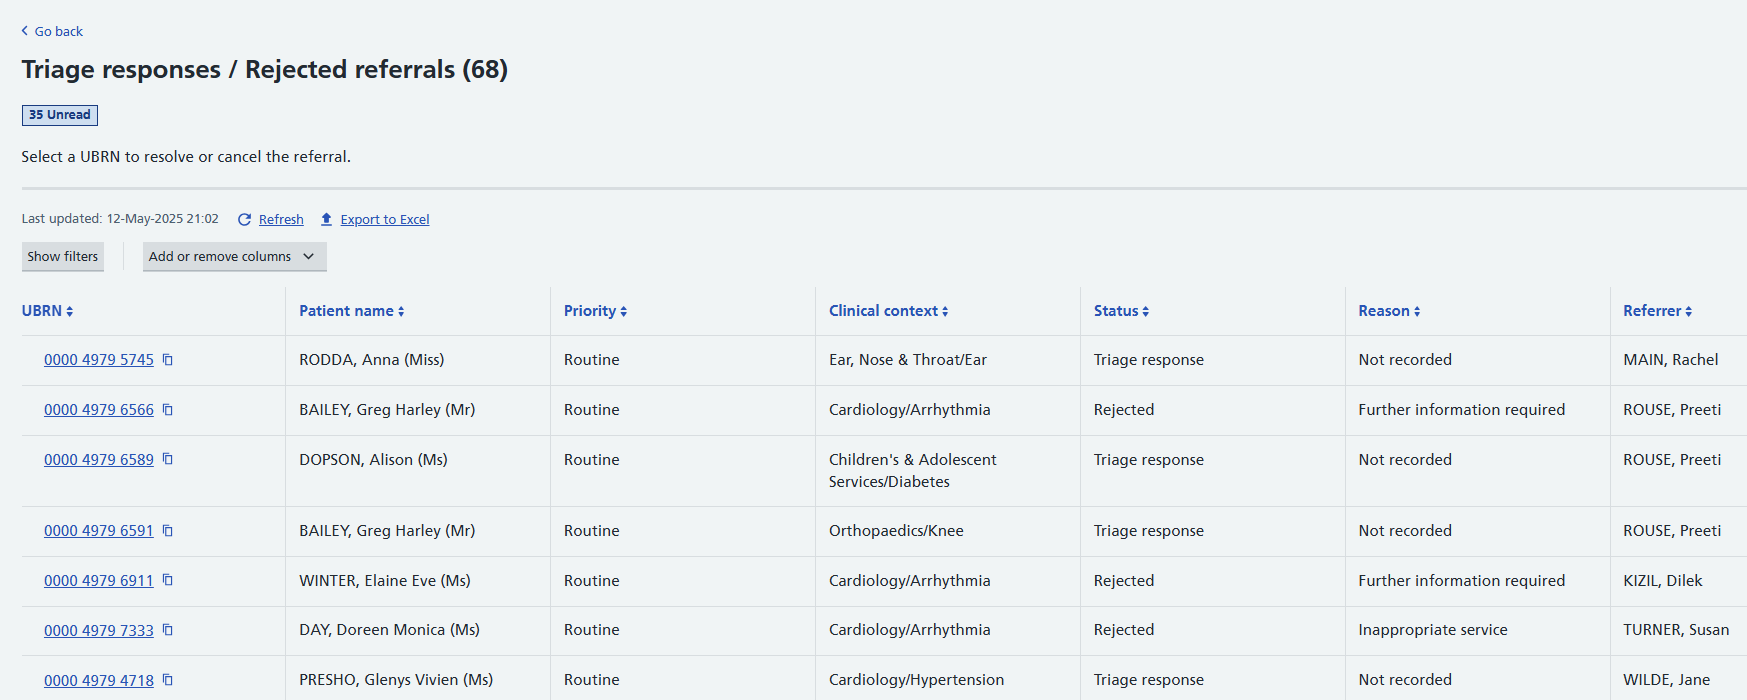
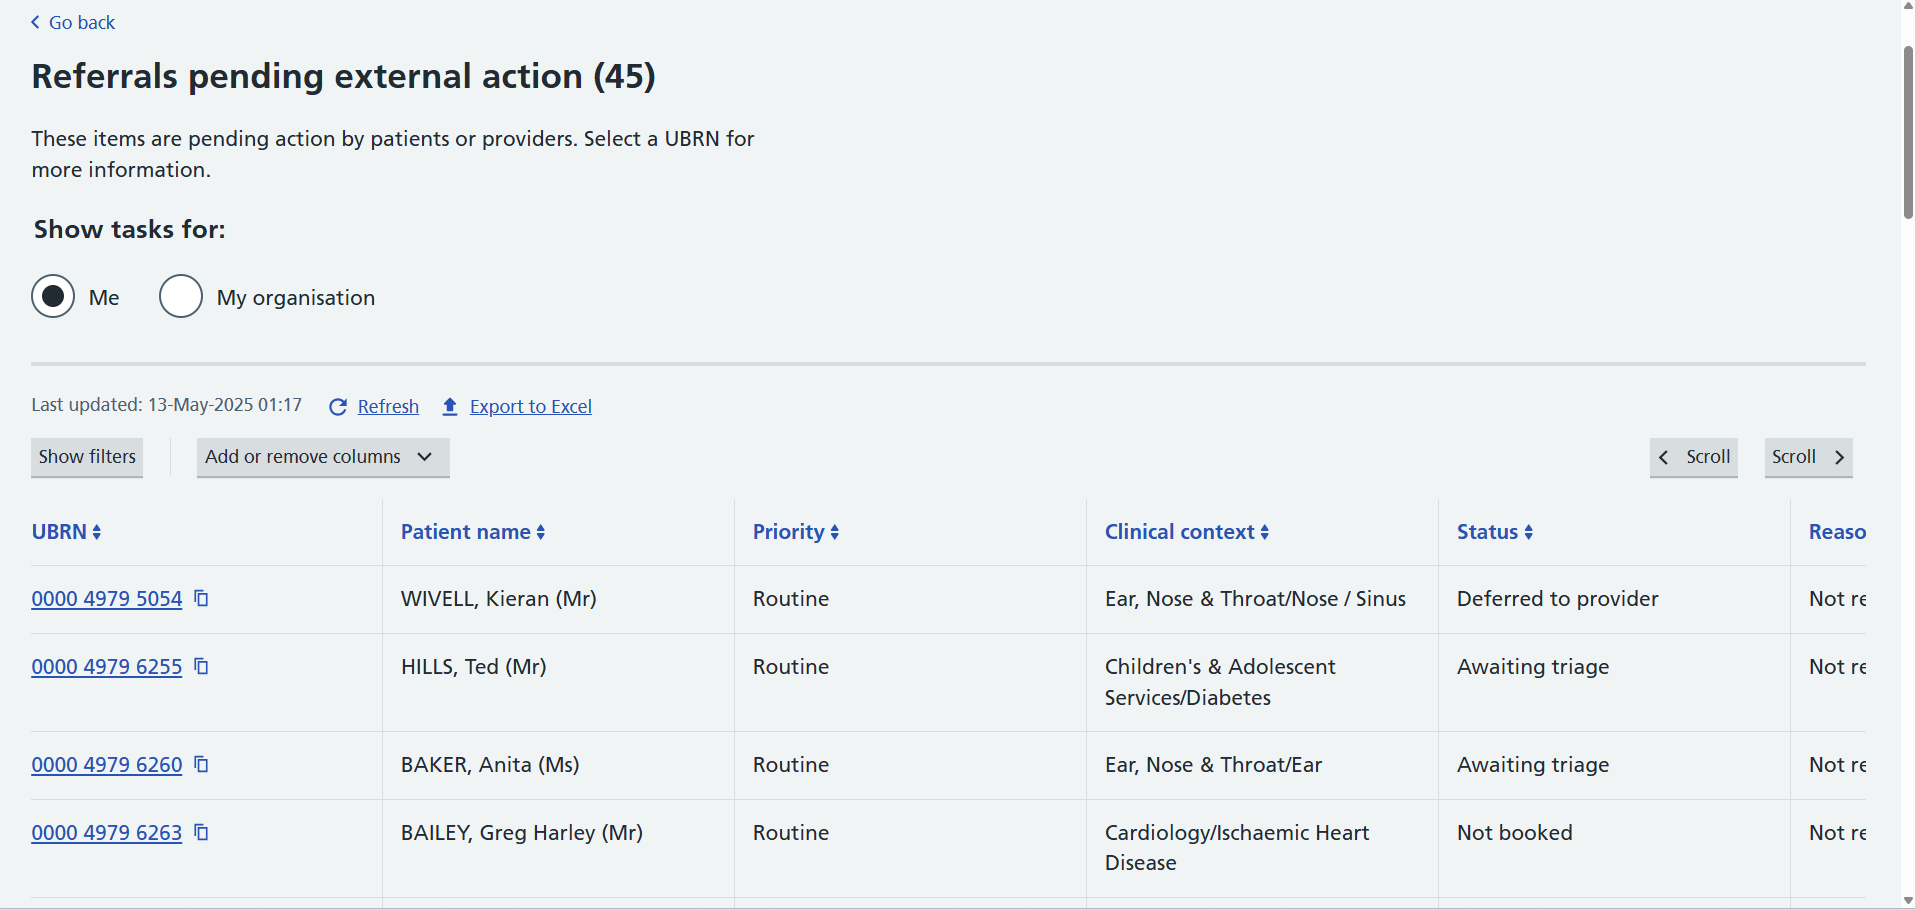
Any selected worklist screen displays a 'Show filters' option. Selecting 'Show filters' will display a filter pane on the left side of the screen. The options that will be shown in this filter area will be dependent on the referral information available in each worklist.
For example, if only ‘Routine’ and ‘2 Week Wait’ referrals are in the worklist results, then only these options will be available to be selected to filter on.
When filters are selected, these will be applied to the list automatically and will be retained for when users navigate away to a different e-RS screen and return to worklist.

The number of filters selected shows in brackets next to the 'Hide filters' option. The number of filtered results and the total number of worklist items will be shown below the 'Last updated' information. Click on the 'Hide filters' option to hide the filters pane. This will allow further screen space to view the worklist information.
There is an option to ‘Clear’ filters which returns the user to the original data set.
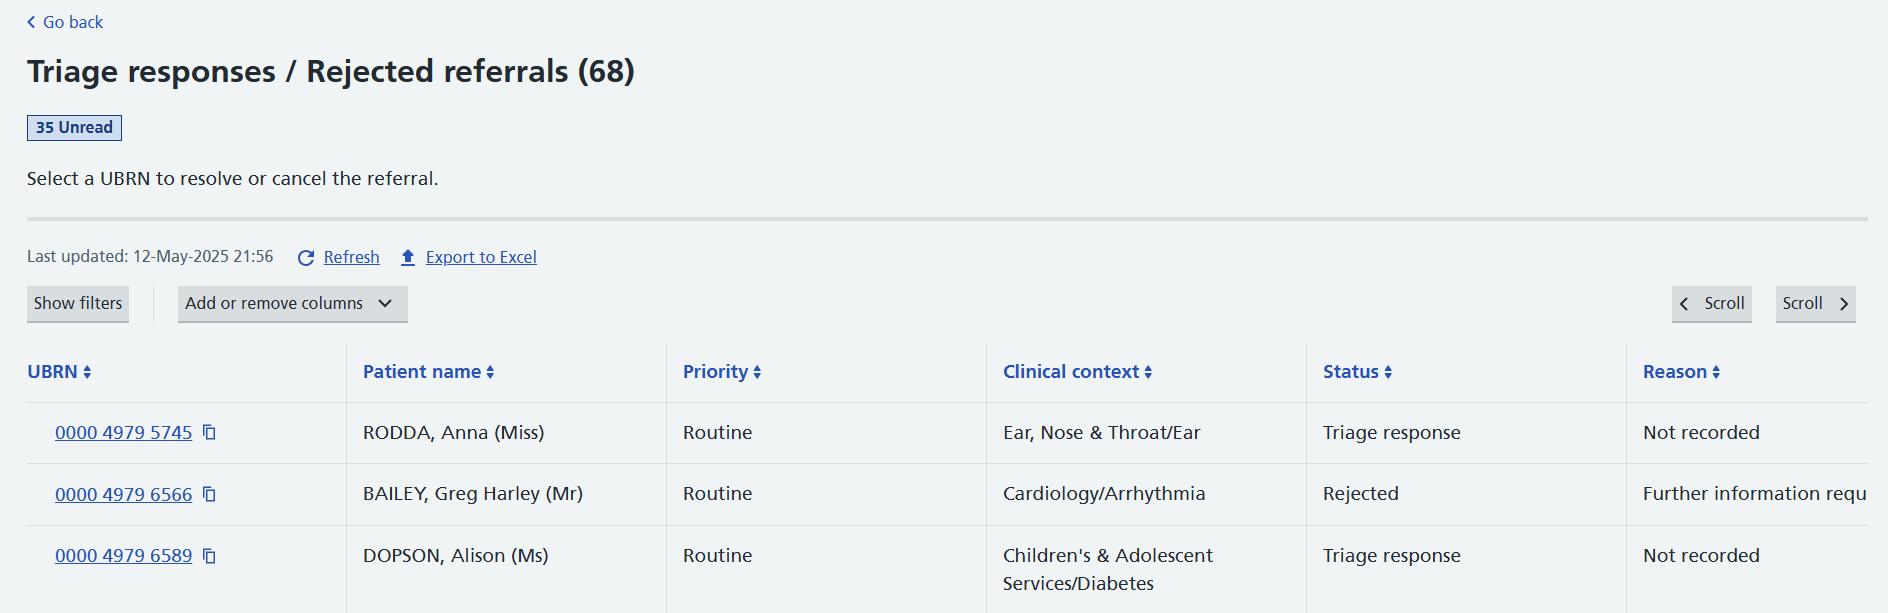
The column headers can be sorted by selecting the arrows next to the heading titles.
Any sorting applied will be retained if the user moves to a different e-RS screen and then returns. For example, if the user actions a referral and returns to the worklist.
The 'Scroll' options display where not all the columns are displayed on a user's screen. This enables the user to move left and right as necessary to view remaining columns.
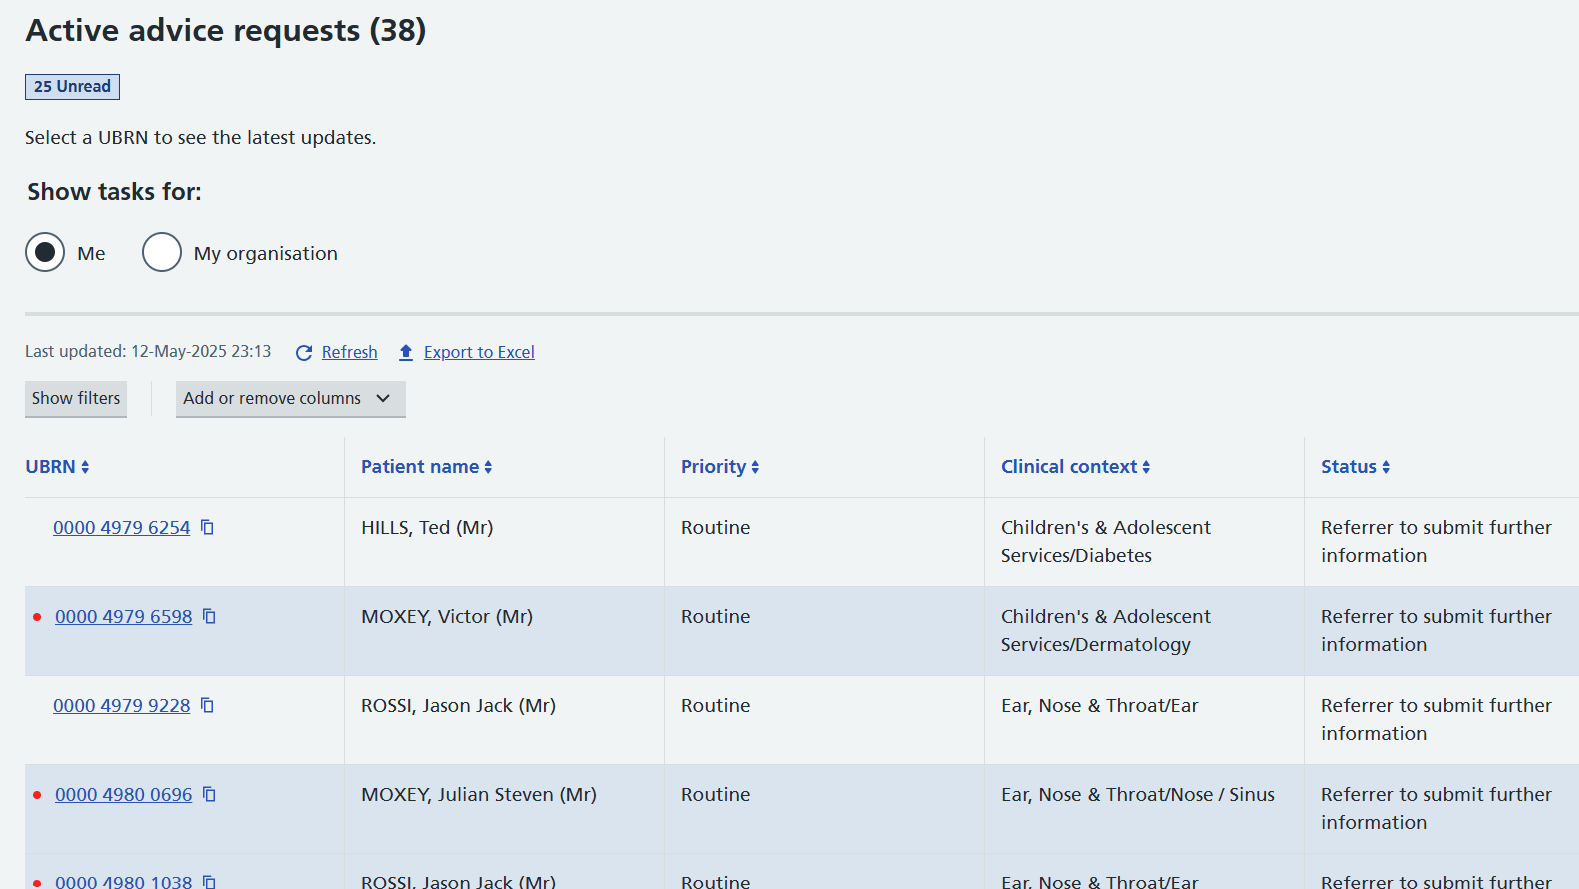
When you select a UBRN on the 'Active advice requests' worklist, the 'Advice summary' screen is displayed. UBRNs on all other worklists display 'Referral summary' screen. You can view the information on the advice or referral from the summary screens and perform any required actions.
Notification badges
Worklist dashboard display 2 types of notification badges:
‘Unread’ badge – this shows the total number of UBRNs that have arrived on the worklist since the user last viewed it and where no action from the organisation has been taken. This badge will be displayed on the following worklists:
-
Triage responses/Rejected referrals
-
Incomplete UBRNs
-
Active advice requests
-
Assessment results/Cancelled referrals/Did not attends
When one of the above worklists is selected, the unread notification appears below the worklist heading and the number of unread notifications corresponds with the number of UBRNs in that worklist highlighted with a red dot.
Once the UBRN has been selected, either by the logged in user or by someone else in the same organisation, the count on the badge is updated and the red dot by the UBRN removed.
If the required action is taken, the UBRN will be removed from the worklist and the worklist count updated.
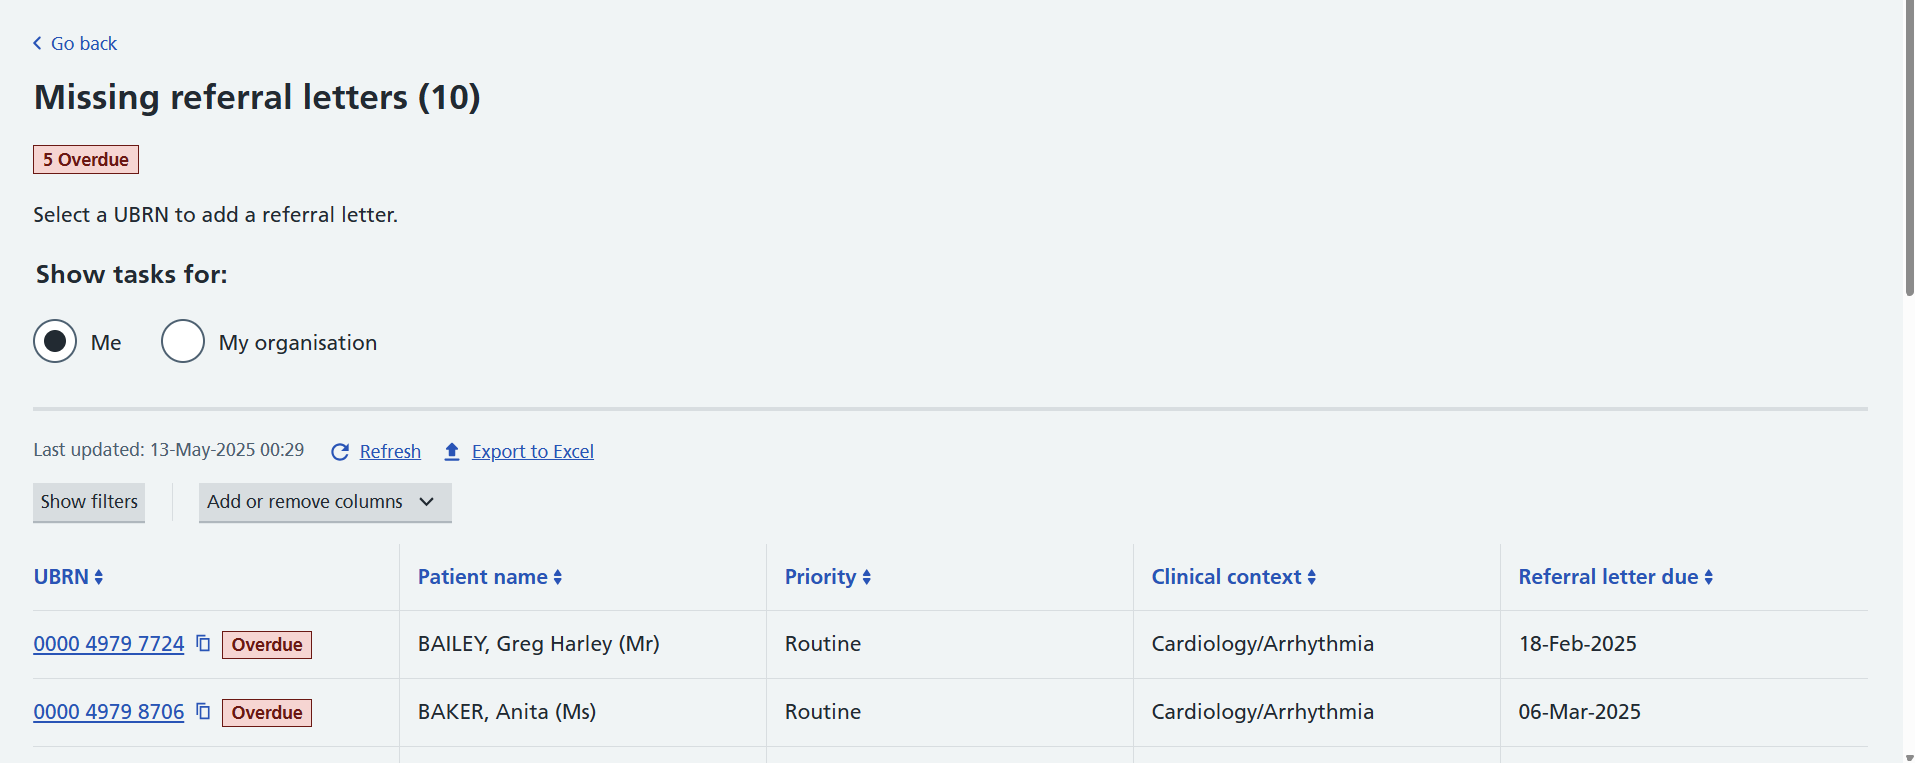
‘Overdue’ badge – this will appear on the ‘Missing referral letters’ worklist. When the worklist is selected, the badge will also display under the worklist name and next to any UBRNs for which the clinical information is overdue.
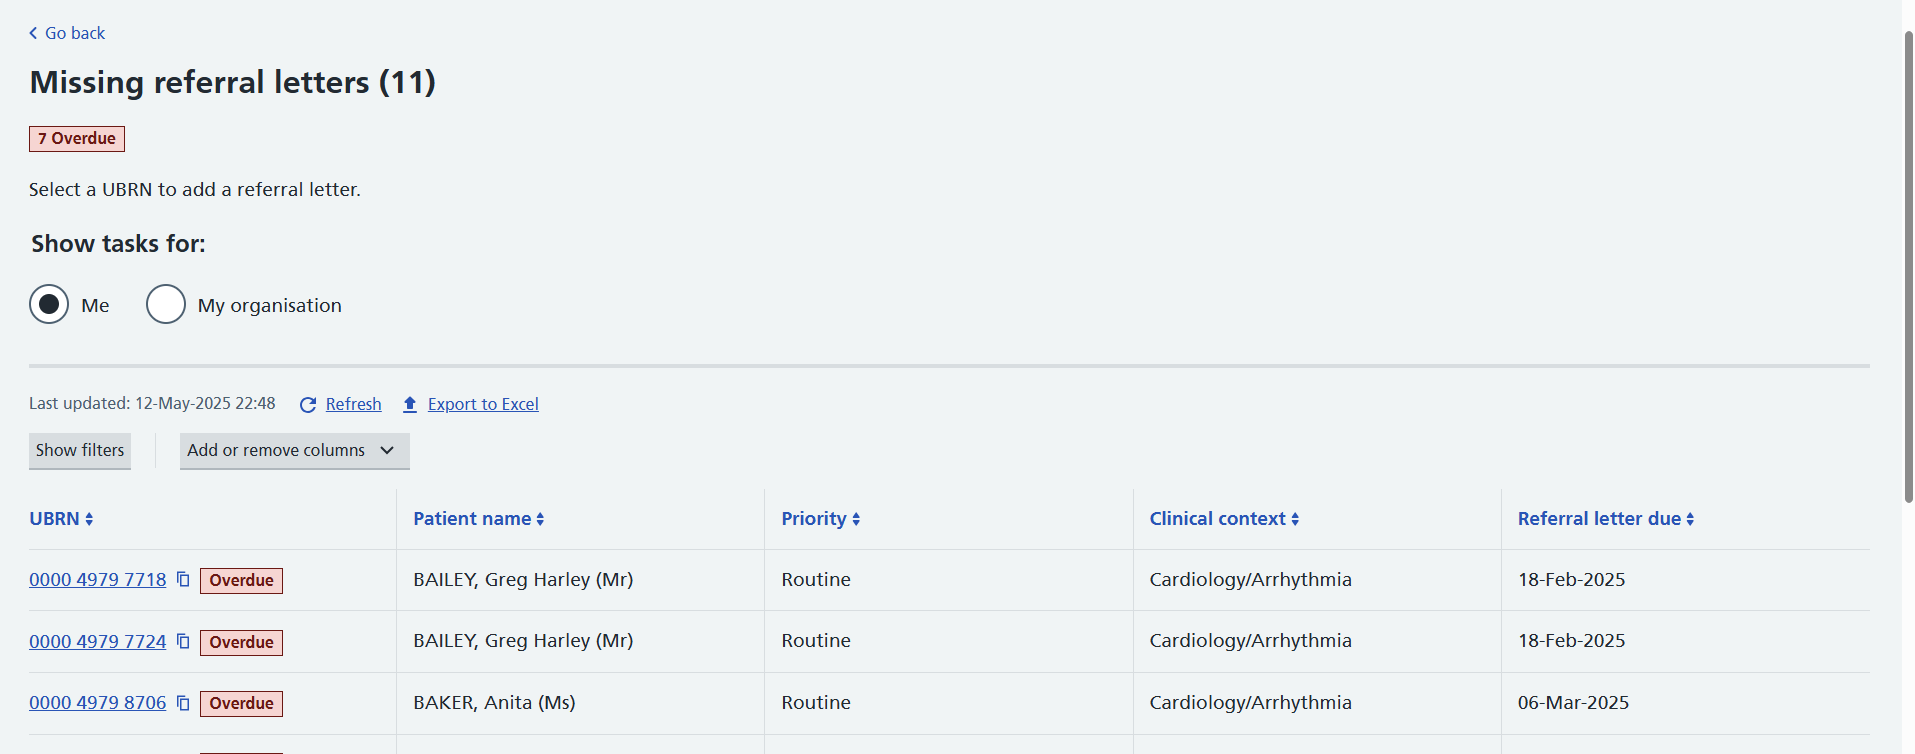
Routine referral letters should be attached within three days of the referral being created, one day for urgent and one day for two Week Wait.
If information is not attached after this time period, the ‘Overdue’ badge will be displayed.
Once a letter is added to a referral, it will be removed from the worklist and the count on the ‘Missing referral letters’ worklist tile updated.
If a referral is being actioned by a user within an organisation and another user attempts to open the summary screen to perform an action on the same UBRN, the second user (and any other subsequent users) from the organisation will receive a message similar to one below.

This message appears on screen until the first user to edit the referral has completed or abandoned their selected action.
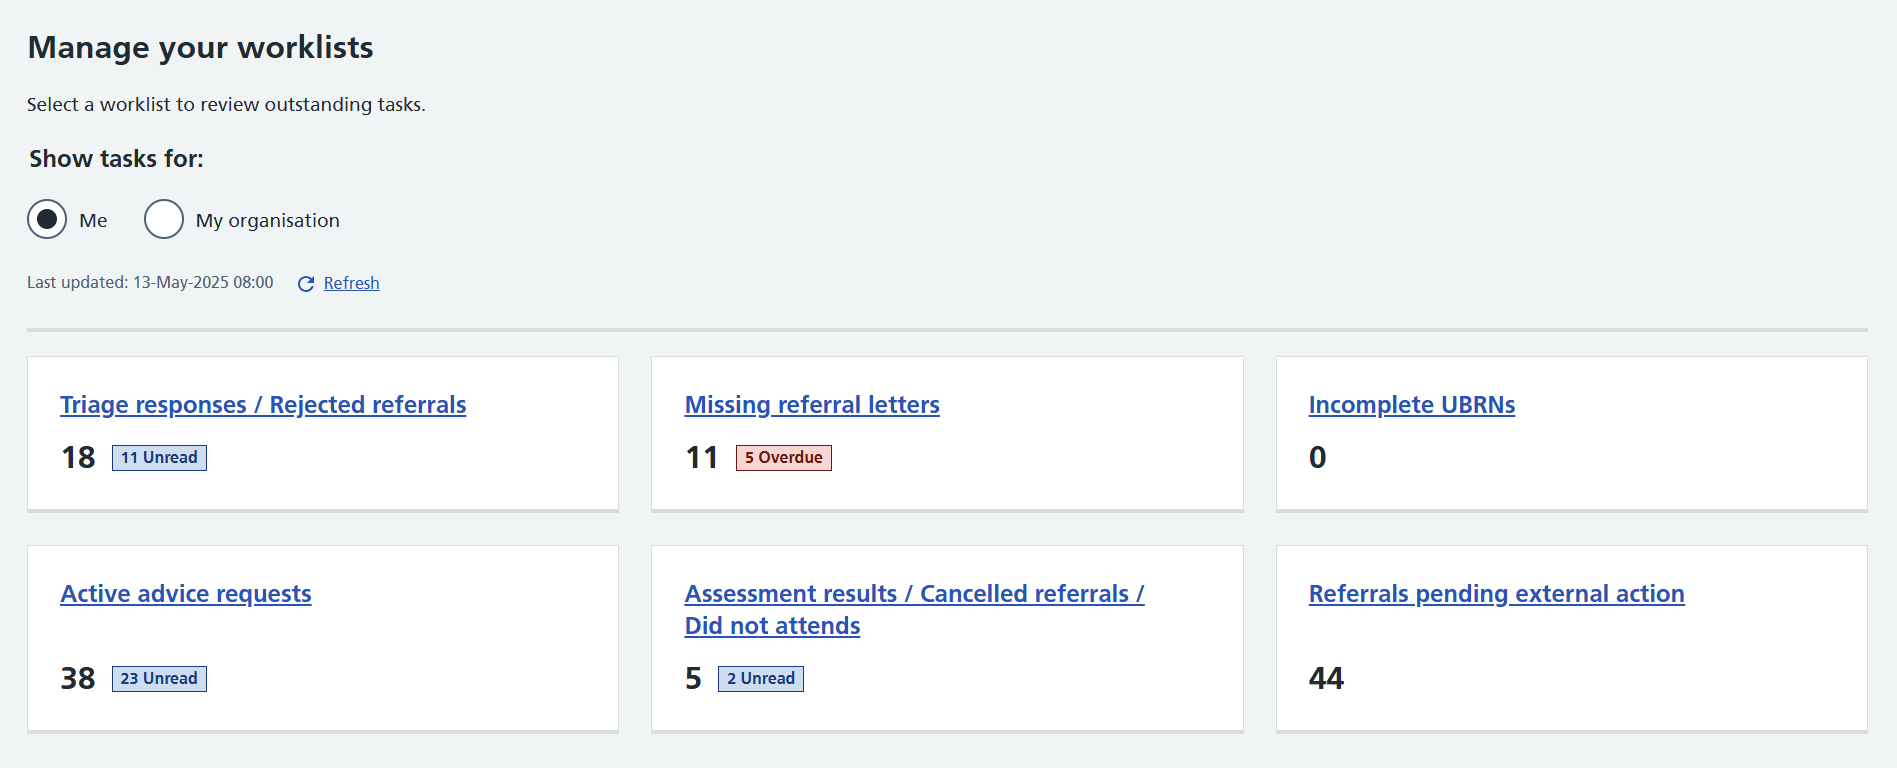
The 'Last updated' information shows above the worklist tiles on the worklists dashboard.
When a worklist is selected, the 'Last updated' information shows above the UBRN details on each selected worklist.
When users select a referral to either perform an action, or review information, and then return to the worklist, the information will automatically be refreshed.
The blue ‘Refresh’ link can be selected to retrieve the latest worklist information at any time.
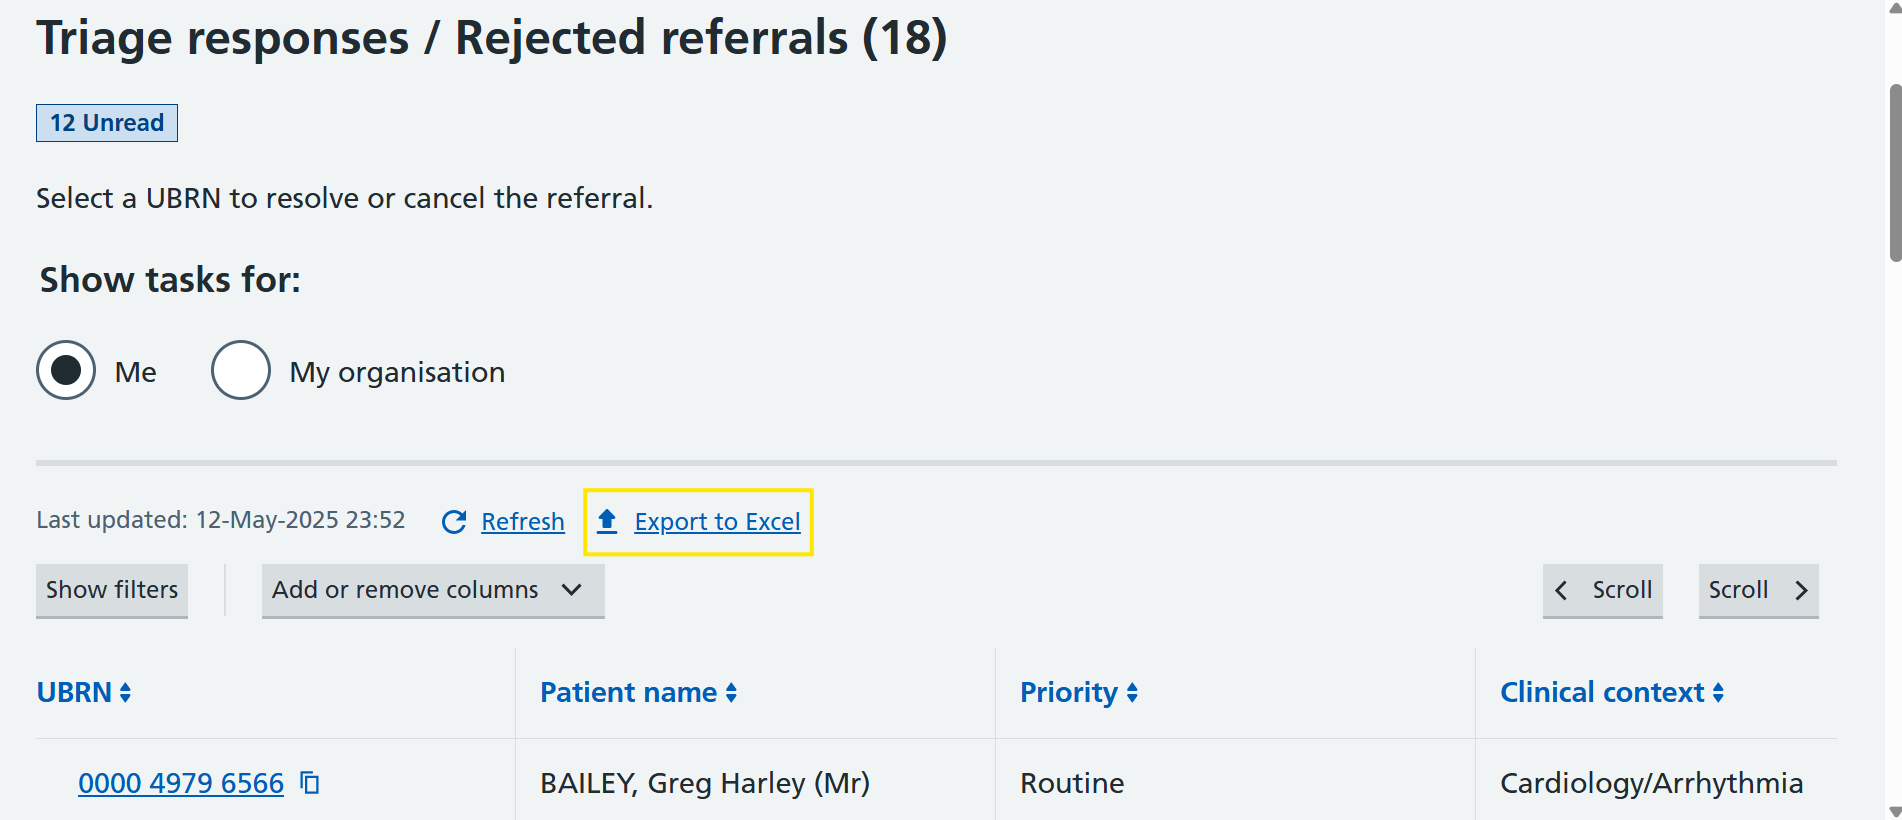
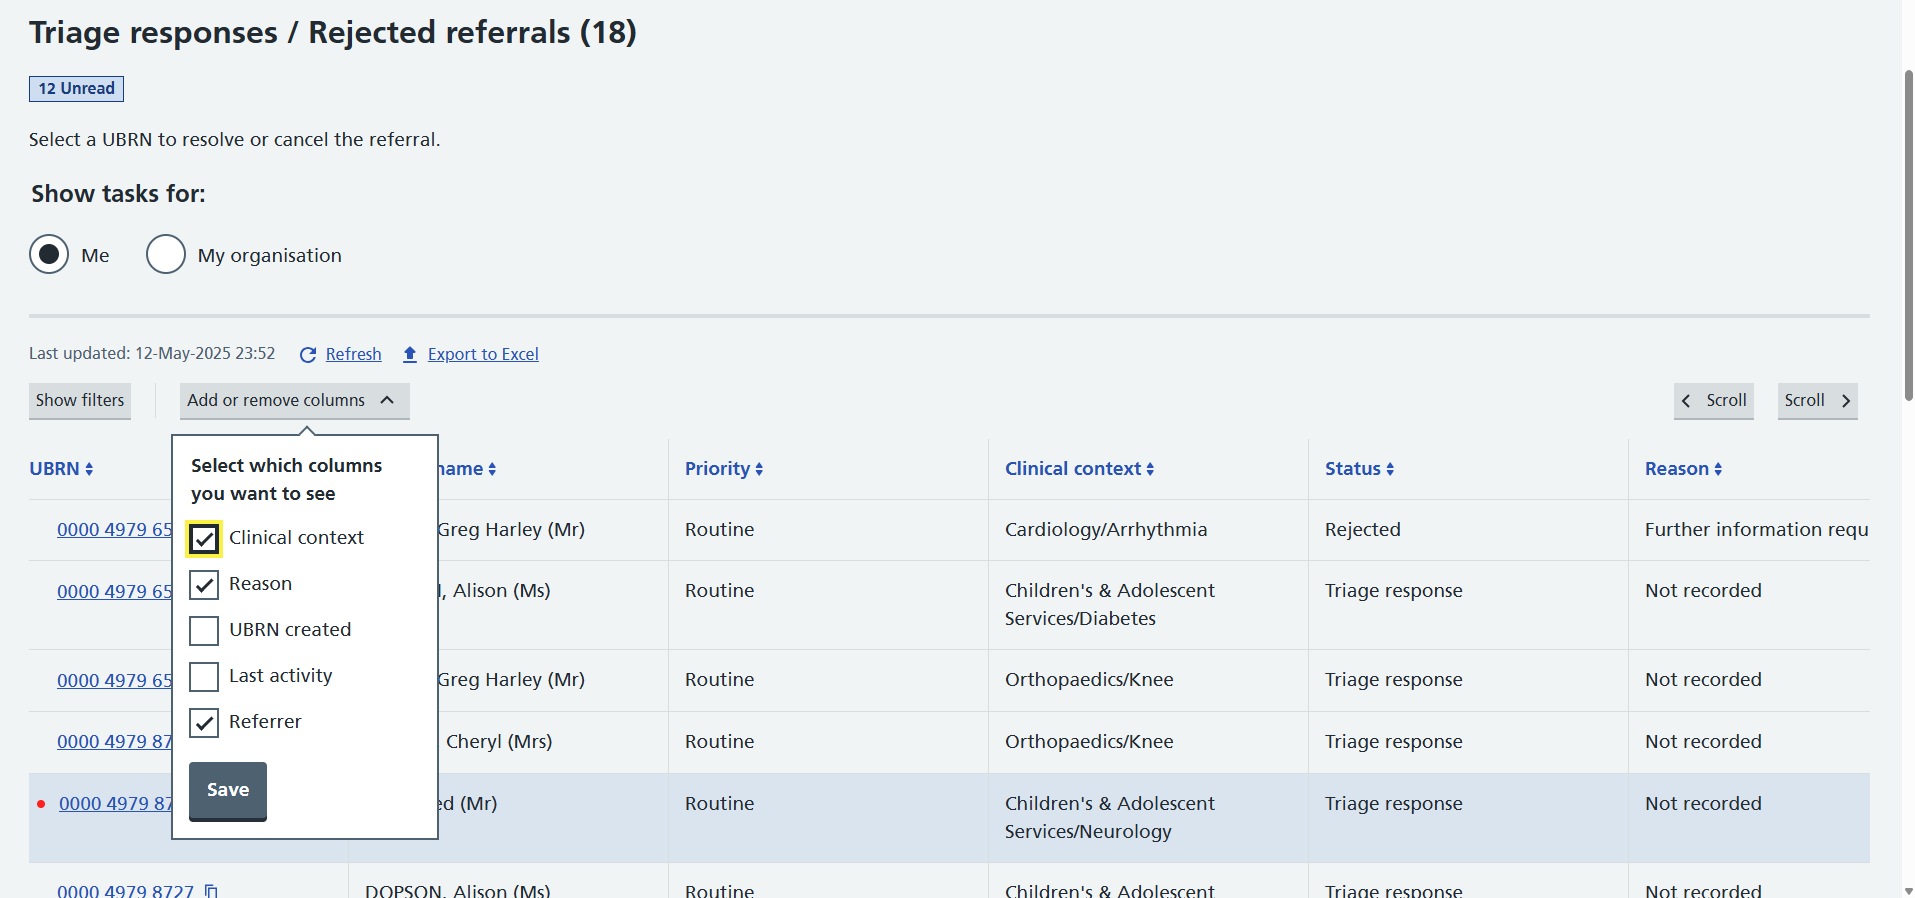
When a worklist is selected, you will notice an ‘Export to Excel’ option above the column headings. Use this option to export the information displayed on the worklist into an Excel format.
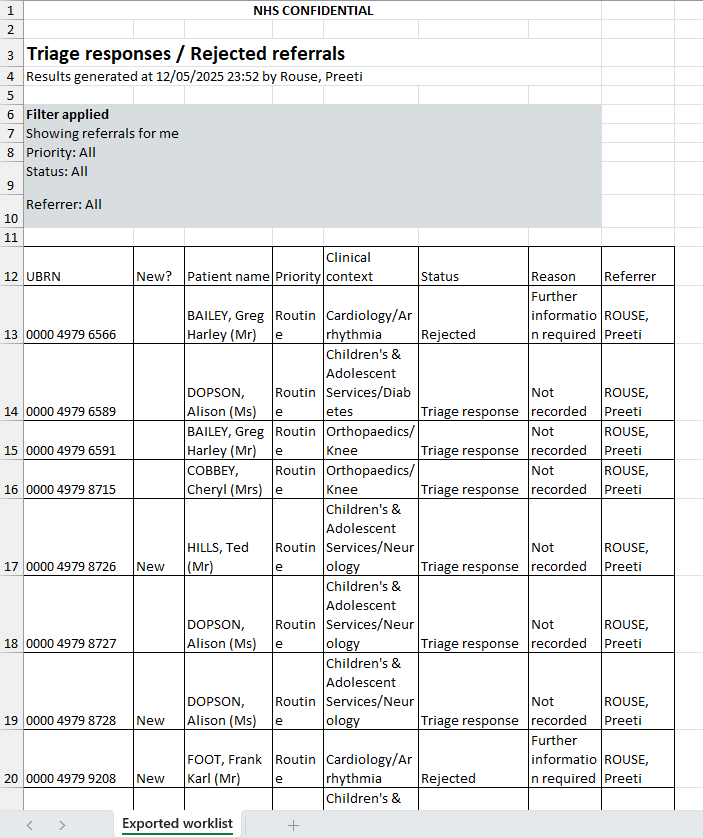
The example above shows how the worklist would look when exported into Excel. The information displayed is exactly what the user was viewing on the worklist. From here, the user can print or save the information.
Things to note:
- the columns available to select are based on those displayed in the active worklist
- the columns not shown on this reveal are mandatory and cannot be removed (for example, UBRN, patient name, priority and status)
- to add or remove columns, select the required tick box and select ‘Save’
- any changes are saved permanently and remembered
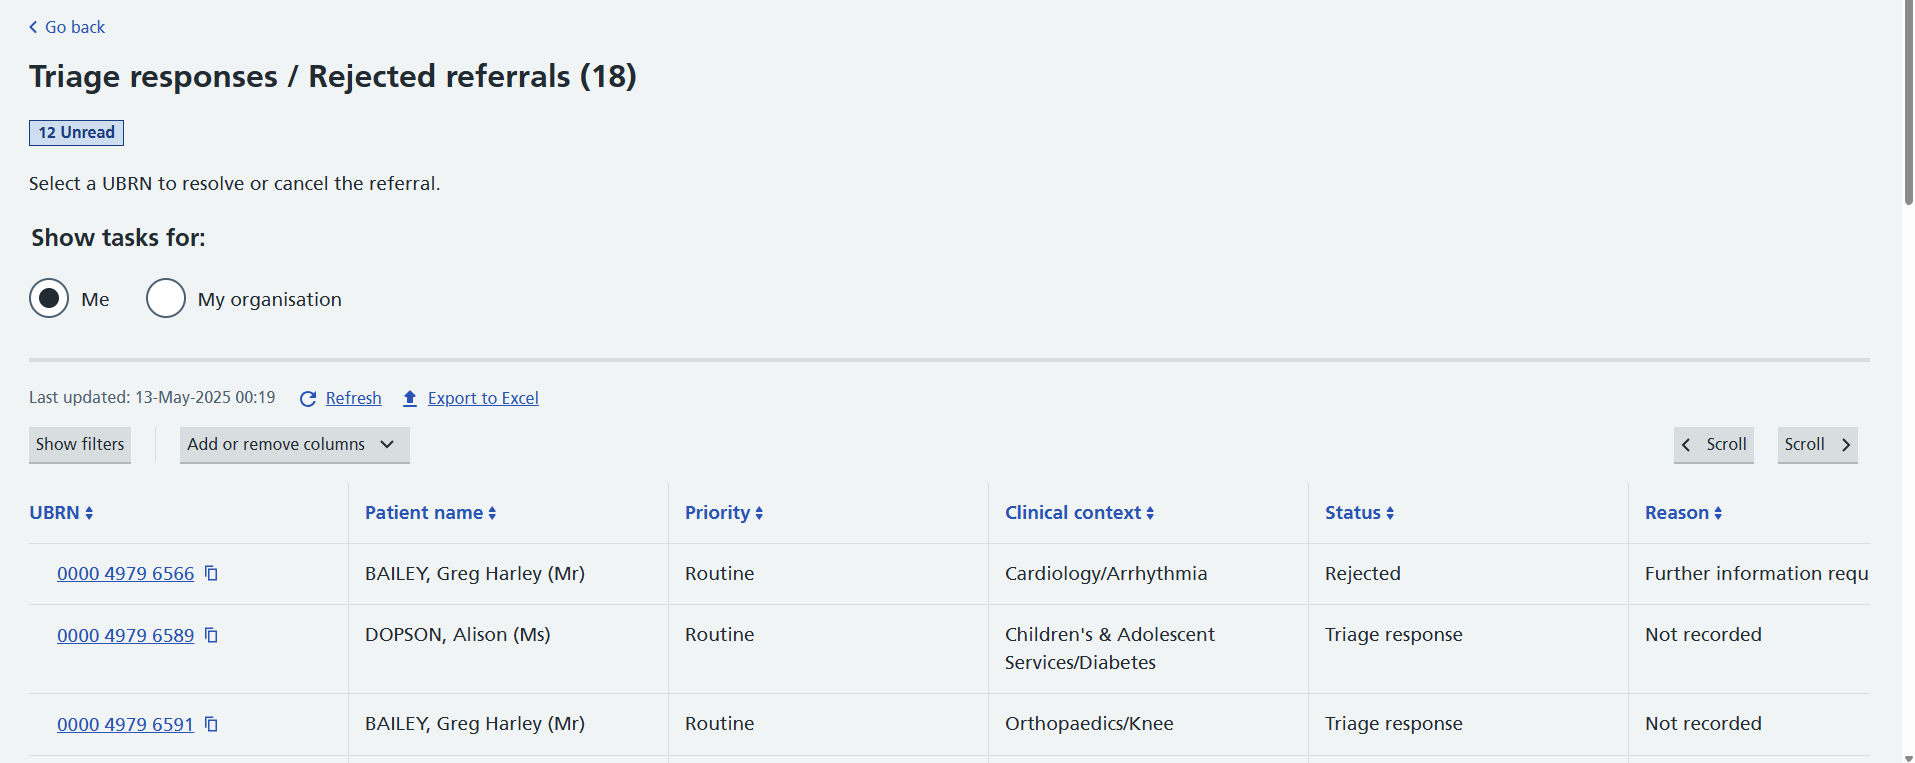
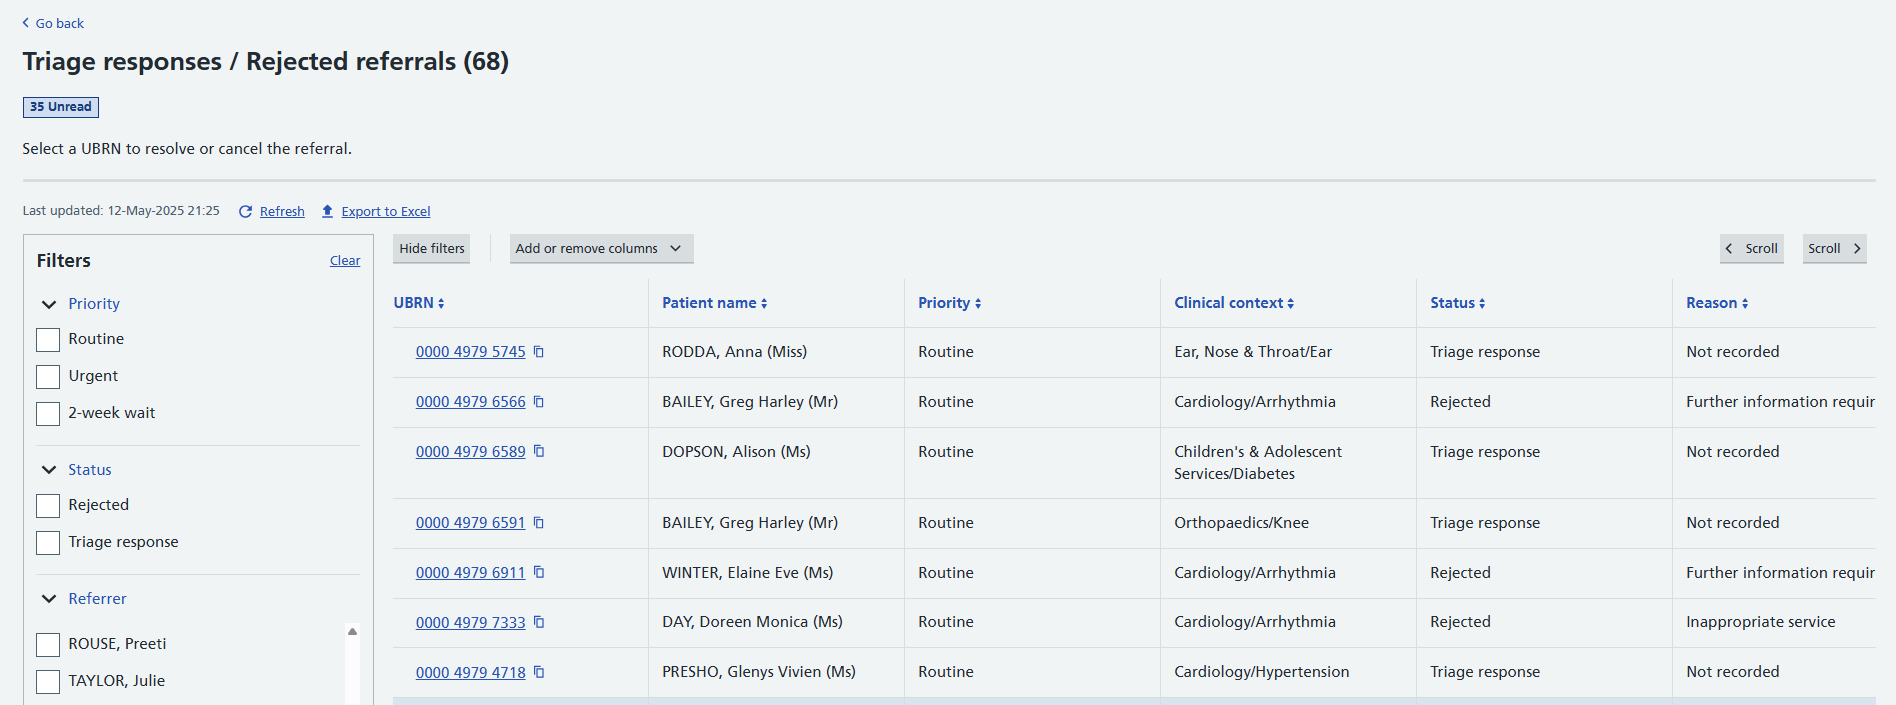
This worklist shows referrals that have been returned to the referrer with advice and/or rejected by the service provider.
Status: Triage Response
Referral sent to a Referral Assessment Service (RAS) has been assessed by a service provider and sent back.
Review and action accordingly.
Information on this worklist and how to action referrals can also be reviewed on referral assessment services (RAS) webpage.
Status: Rejected
After the receiving clinician has assessed the referral information provided by the GP; it is felt that the patient could be managed more effectively either by an alternative, more clinically appropriate service or in primary care. The referrer must act upon these referrals. This may include cancelling the referral or identifying new, more suitable services.
View any comments made by the service provider and take clinically appropriate action from the options available.
Service providers will not be able to view and action the referral until a referral letter has been added.
In the image example above, there are 10 letters outstanding, with five of them being overdue.
Once the appropriate action is carried out, either by the logged in user or somebody else in the same organisation, the count will be updated.
The overdue label is automatically generated. For Routine referrals it is 3 days after the referral request is created, 1 day for Urgent and 1 day for two Week Wait.
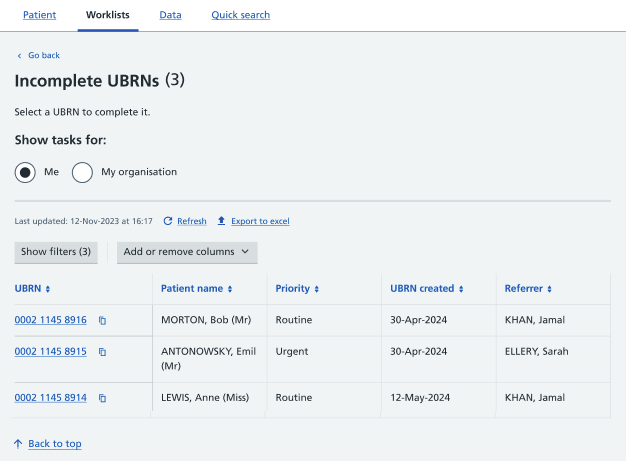
UBRNs on this worklist are draft referrals which have had clinical information attached but have not been completed within the GP system.
Before the incomplete UBRNs can be processed you will need to ensure that a duplicate referral has not been created. This can be done in two ways:
- Using the Patient tab, you can search by UBRN or patient's NHS number and access the Patient Activity. This will reveal all of the patient’s referrals and you can check for duplicate referrals.
- Check for a duplicate referral within your GP software system – this can be used if the duplicate referral was initiated within the clinical system.
From both the Incomplete UBRNs worklist and Patient Activity list, a user can select the UBRN which will direct them to the Referral summary screen. There they will have the option to either cancel the request or select a service for patient's referral.
More information can also be reviewed from the Incomplete UBRNs page.
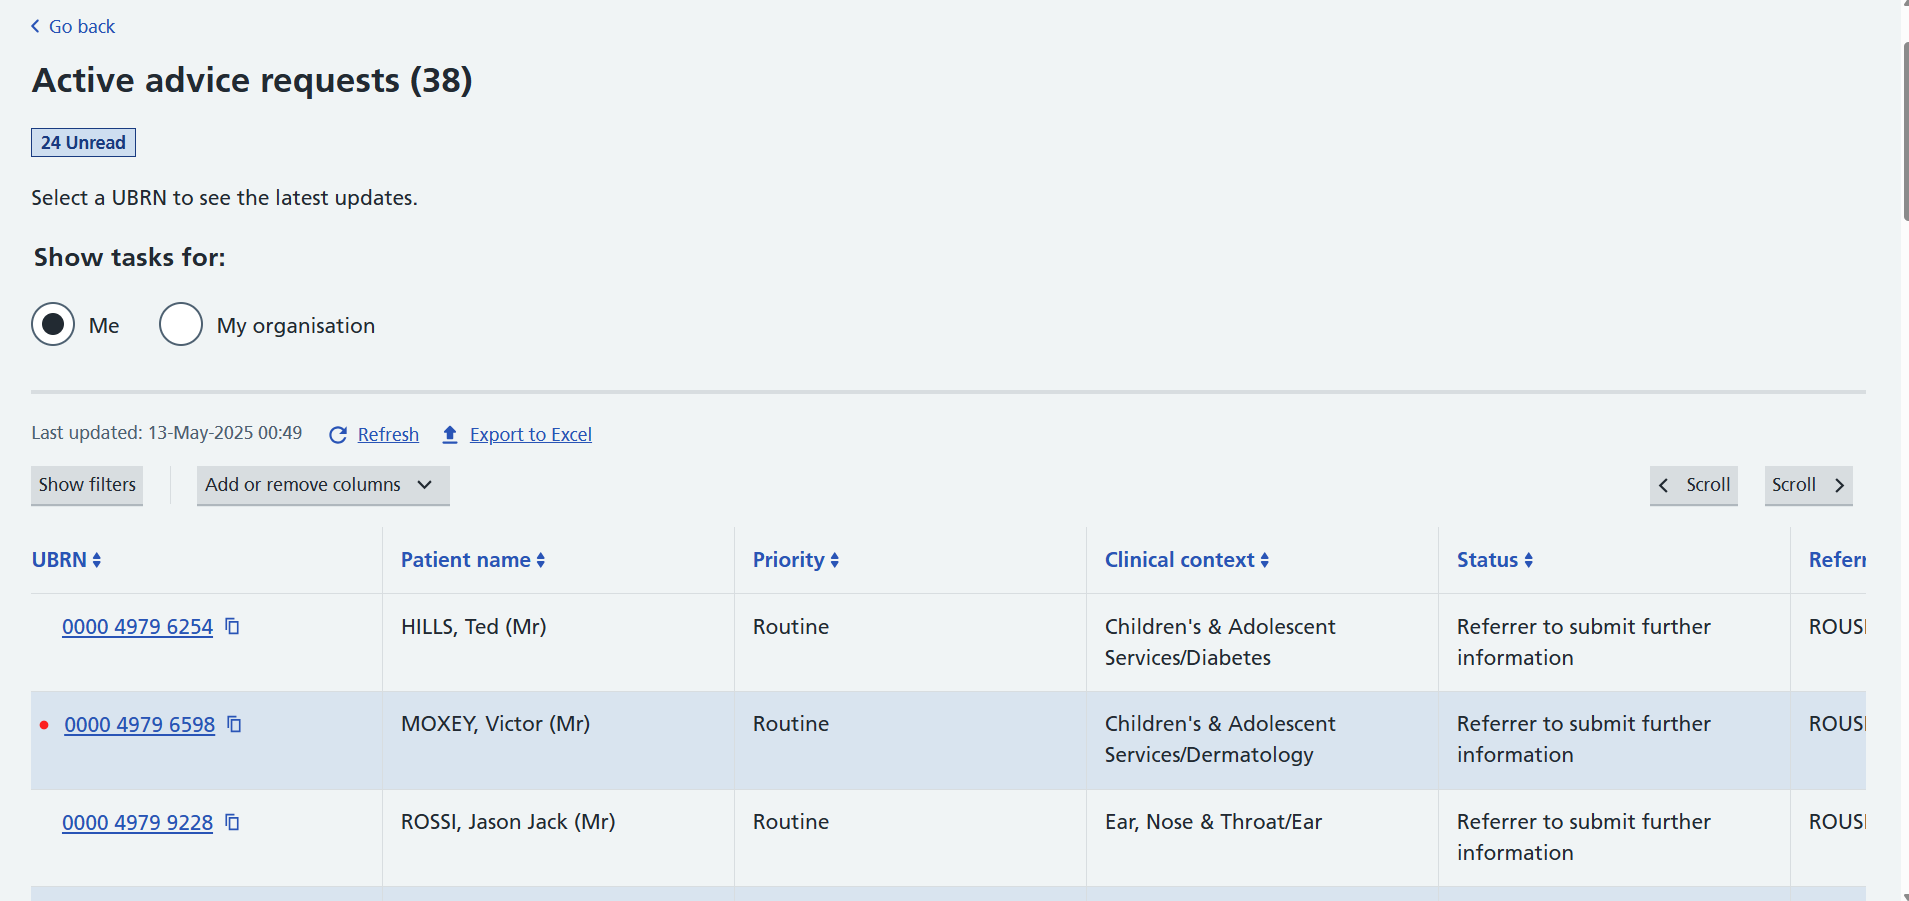
UBRNs on this worklist are for advice requests and responses. You can act by either replying to the response, ending the conversation, converting the response into a referral or remove the referral from the worklist (provider converted referrals only).
-
Select the UBRN.
-
Review the contents, which may include attachments.
-
If you need to continue the conversation you can type your reply into the 'Send new message' box and click 'Send message'. Use 'Select file' option to upload any additional information.
-
Where no further action is required, print the conversation, if required, using 'Download summary' option for the patient’s medical records and select 'End Conversation' from 'Select action' dropdown. For a referral that has been converted by a provider, select the 'Remove from worklist' button.
-
Where a referral is required you can select 'Create referral' from the 'Select action' dropdown.
More information for Active advice requests worklist can be found on the Advice and guidance for referrers page.
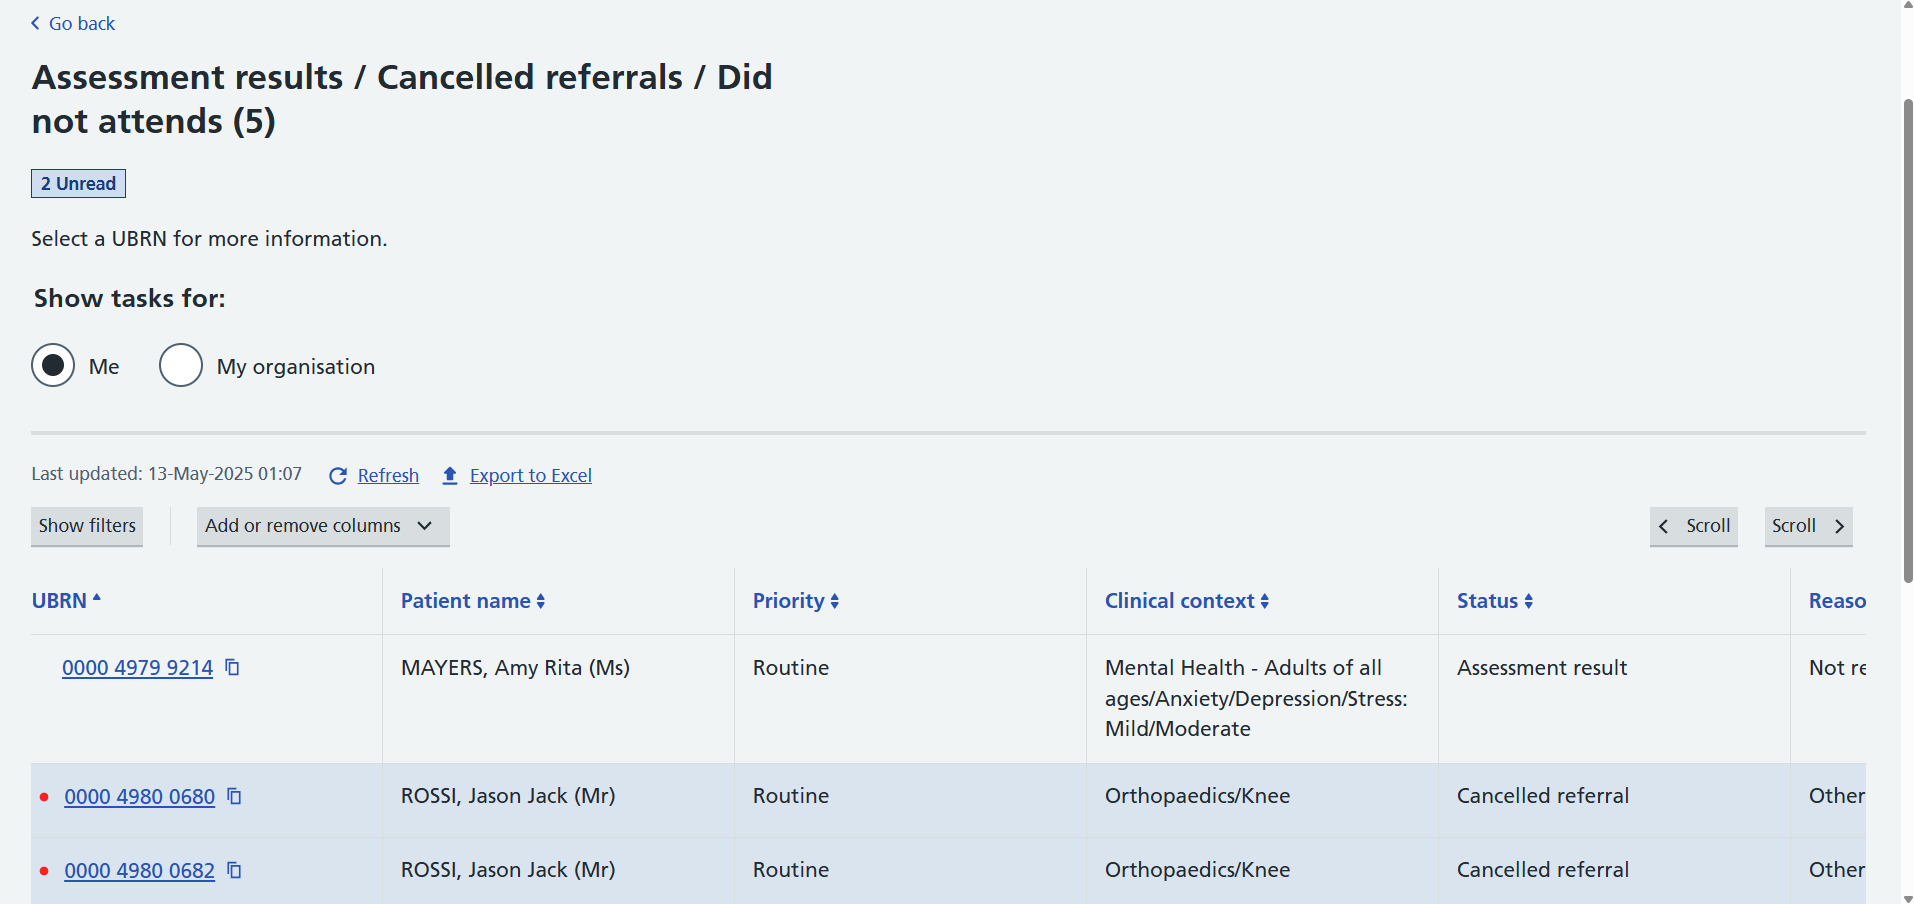
The worklist will show the status of the referral and any reason associated to the status.
View any comments made by the service provider and take clinically appropriate action from the options available.
Assessment Result
Referrals with this status have been sent to a service with Clinical Assessment Service (CAS) functionality.
Review and remove.
Cancelled referral
Referral requests, along with the patient’s appointment have been cancelled.
Check the reason why the referral request has been cancelled and remove it from the worklist.
Did not attend
If a patient was referred to a directly bookable service and they did not attend their appointment, the provider sends this back to notify the referrer.
View the referral and take the appropriate action, which may include re-submitting the referral request to the same (or a different) service.
Booked referrals, whether to indirectly bookable services or directly bookable services, will not be presented on this worklist.
The patient tab
The 'Patient' tab can be used to find a patient’s referral if you have the right access and the referral has been active in the last 18 months.
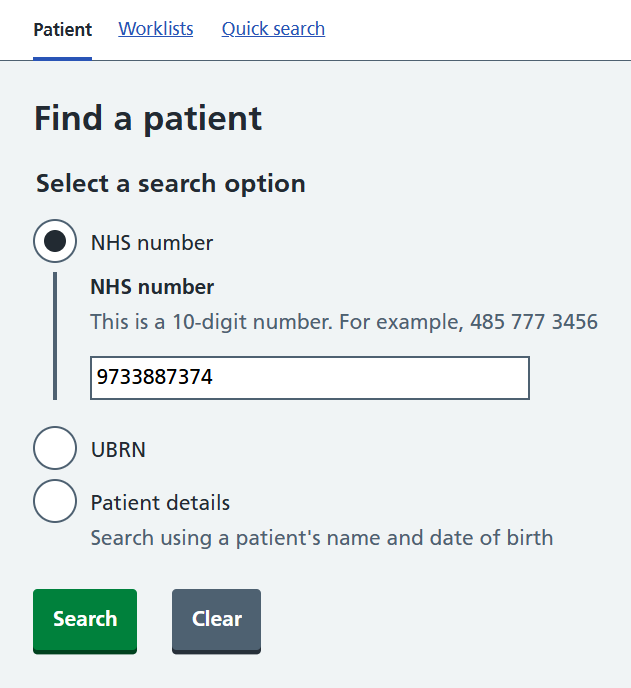
You can search for a patient using either their NHS number, a specific UBRN or their demographic information.

A 'Patient Activity' list will be displayed for each referral created for the patient, with actions for each one.
In the 'Patient' tab you can also use the 'Update patient and contact details' option to change patient information.
Select the 'View archived referrals' link to see referrals for the patient that were last acted upon 18 months ago or more.
Last edited: 7 July 2026 2:01 pm