Using GitLab in DAE
Getting started with GitLab in the Data Access Environment.
Introduction
GitLab is a code management and code version control tool available in the Data Access Environment (DAE). It provides users with a secure, cloud-based repository to store and back-up versions of code when using Databricks and RStudio in DAE.
This guide is intended to help you get up and running using GitLab in the Data Access Environment (DAE).
It provides guidance on:
- accessing GitLab in DAE
- using GitLab with Databricks
- using GitLab with RStudio
- GitLab best practice
Users are encouraged to use the extensive GitLab user guidance on the GitLab Docs webpage alongside this guide.
Contact us
If you have any questions about guidance or functionality, or are experiencing any operational issues, such as problems with system access, please contact our National Service Desk on 0300 303 5035 or via email at [email protected].
For general enquiries, such as questions about Data Sharing Agreements (DSAs) or other data-related issues, please email our Contact Centre at [email protected].
Logging in
Logging in to the DAE portal
When logging in for the first time, you will be asked to create a two-factor authentication code before you can sign in. Please refer to the Data Access Environment set up guide for help setting up your two-factor authentication code.
To log in to the DAE portal:
- Enter your email address and password.
- Click Next.
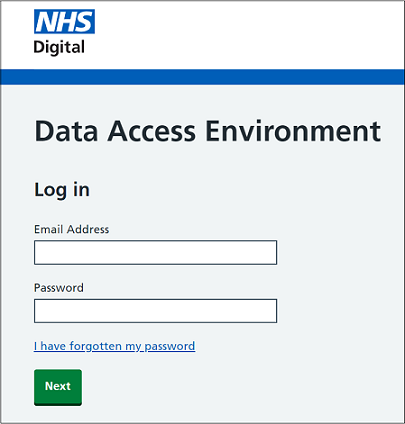
- Enter your two-factor authentication code.
- Click Log in.

You will be asked to login again.
- Enter your email address and password.
- Click Next.
- Enter your two-factor authentication code.
- Click Log in.
The DAE Agreement Selection screen will be displayed.

Logging in to GitLab
To log in to GitLab:
- From the DAE Agreement Selection screen, select the agreement that permits access to the required analytical tool from the Agreement drop down menu.
- Click on Submit.

- When you have the correct agreement selected, click on the GitLab analytical tool.
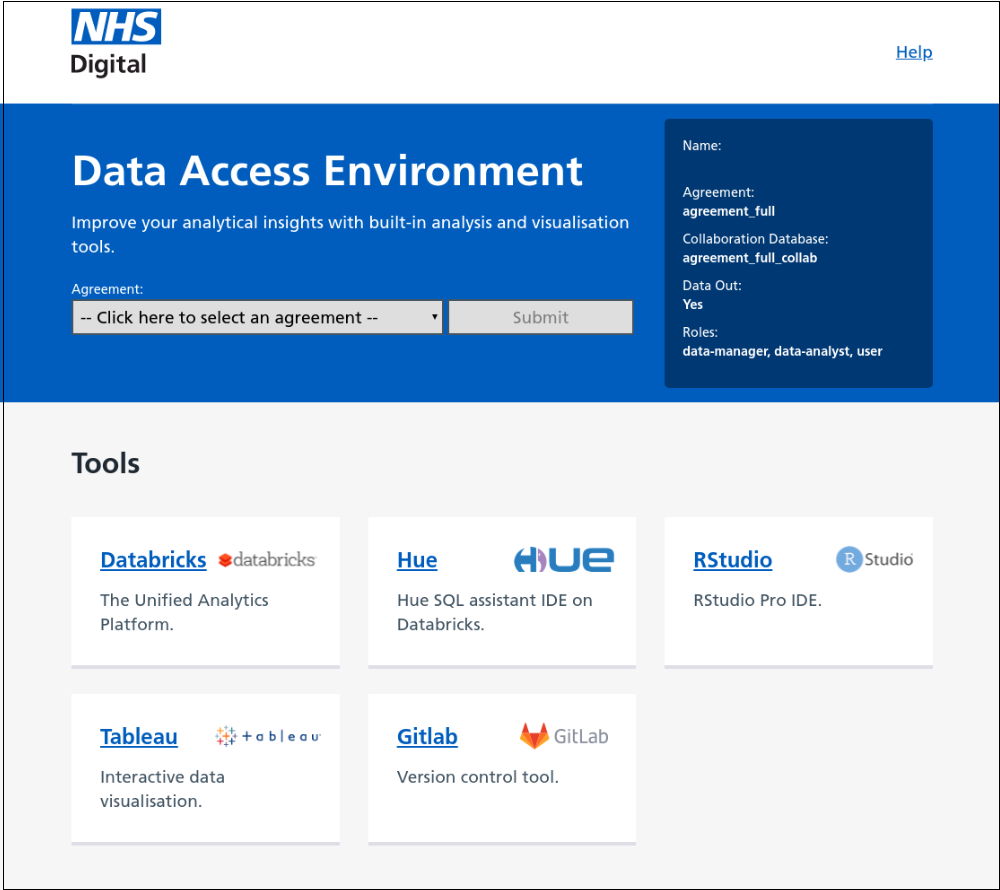
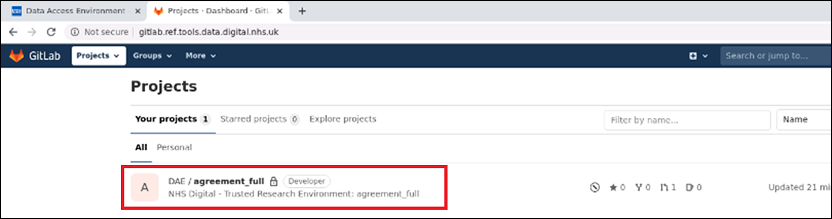
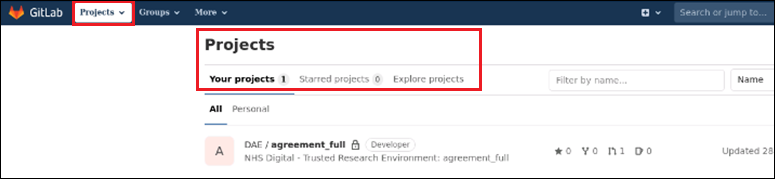
After logging in, the GitLab Projects screen will be displayed.
When logging in for the first time, a screen may be displayed requesting an ‘SSH key’. This screen does not require any action and can be closed.
Project and folder set-up
Each agreement has its own, dedicated GitLab project. Users on the same agreement can share code and content within GitLab, but sharing is prevented across agreements.
When first logging into GitLab, users will notice that the Project (repository) has been automatically created. The project name is identical to the Agreement the user has selected.
Users cannot create new Projects within GitLab in DAE. Instead, users should create a folder structure within the Project, to organise their work.
Using GitLab with Databricks
GitLab is currently not fully integrated into Databricks and instead operates as a ‘standalone’ tool. Users already familiar with GitLab will notice that access to GitLab from the command line in Databricks is not available.
This means that:
- GitLab should be used inside the GitLab browser window
- GitLab repositories cannot be cloned to a local Databricks session
- code cannot be pushed or pulled between GitLab and Databricks - however, users can transfer code between GitLab and Databricks using a manual process described below
- after opening GitLab under a selected agreement, users cannot access any GitLab repository other than the project associated with the selected agreement
- users cannot create projects and should instead use folders to organise their work
Transferring code from Databricks to GitLab
There are 2 methods of transferring code from Databricks to GitLab:
- transferring files or notebooks (recommended)
- copying and pasting code
Transferring files or notebooks
Transferring entire files or notebooks is the recommended method of transferring code or files from Databricks to GitLab.
- Open GitLab.
- Click on the required project on the home page.
- Create a new 'branch' by clicking the + symbol and selecting New branch. The new branch should be named in accordance with your team's naming convention.

- Navigate to Databricks. Refer to Using Databricks in DAE for information.
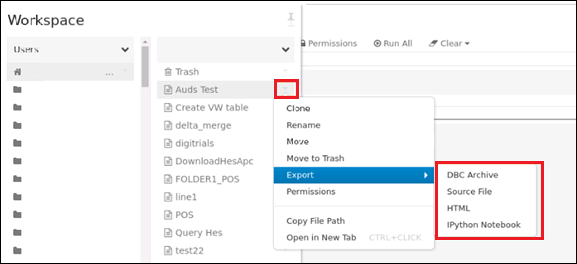
- Click on the down arrow next to the name of the file to be transferred.
- Select Export from the drop down list.
- Select the required file type from the drop down list.
Users are strongly urged to use python file types as they do not contain embedded data.
Be careful if selecting other file types, such as HTML, and ensure any embedded data is removed prior to transfer using the Clear Results command.
The file will be downloaded to the DAE download area.
- Navigate to GitLab.
- Navigate to your branch.
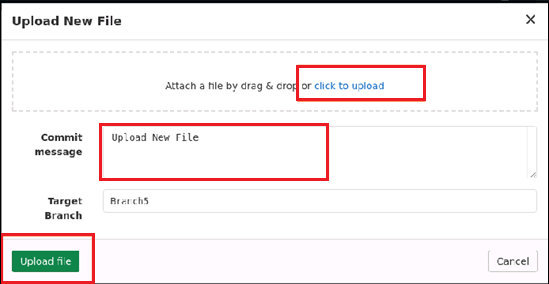
- Click on the + symbol and select upload file.
- Select click to upload for each file you want to upload.
- Navigate to and select the file to upload and select Open.
- Add a suitable, explanatory commit message in the Commit message field.
- Select Upload file.
Files can only be uploaded one at a time.
Having uploaded the required files, you now need to create the merge request:
- Press Create merge request to merge your branch.
- Allocate the merge request, Assignee field, to whoever you wish to review your code. This is typically a colleague or manager, but it's possible to assign yourself as reviewer, if appropriate.
- Press Submit merge request.
- Notify the reviewer to review the merge request.
- On being notified, the assigned reviewer should log into GitLab and look under Merge Requests. At this point, the reviewer may choose to discuss the request with the submitter.
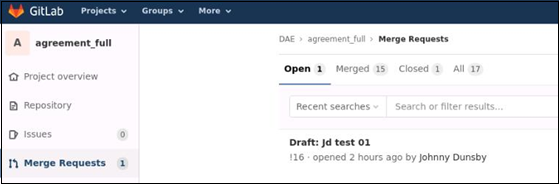
GitLab Docs has instructions on how users can search for requests.
The assigned GitLab reviewer will review the code and either approve or reject changes and provide an informative commentary.
Approved changes can be merged by clicking on the Merge button within the Merge Requests screen.
Copying and pasting code from Databricks to GitLab
Copying and pasting code is not recommended as it is more prone to error. However, it may be appropriate in rare circumstances, such as making a minor change to the markdown code in a notebook.
Anything that may affect functionality or how code is processed should not use this method.
To copy and paste code from Databricks to GitLab:
- Navigate to Databricks.
- Open the notebook from which the code will be copied.
- Copy the required section of code by highlighting the section, right-clicking and selecting copy.
- Navigate to GitLab.
- Locate the file into which the code will be pasted.
- Paste the copied code into the file by right-clicking and selecting paste.
Transferring code or files from GitLab into Databricks
The are 2 methods for transferring code from GitLab into Databricks:
- downloading files and notebooks (recommended)
- copying and pasting code
Downloading files and notebooks
The following method can be used to download an entire file or notebook from Gitlab into Databricks. This is the recommended method of transferring code or files from GitLab into Databricks.
You first need to download the GitLab file into the DAE download area and then import the file from the DAE download area into Databricks:
- Navigate to GitLab.
- Locate the desired file or notebook you wish to download into Databricks.
- Click on the file and press the download icon. This will put the file in the DAE download area.
- Navigate to Databricks.
- Click on the down arrow icon to the right of your personal folder. This will open a sub-menu where you can import files from the DAE download area.
- Select Import and browse for the relevant file.

The formats allowed by Databricks are .dbc, .scala, .py, .sql, .r, .ipynb, .Rmd and .html.
The file will now be accessible from within your personal workspace and can be viewed and edited in the same way as other Databricks files.
Copying and pasting code from GitLab to Databricks
Copying and pasting code is not recommended as a rule, as it is more prone to error. However, it may be appropriate in rare circumstances, such as making a minor change to the markdown code in a notebook.
Anything that may affect functionality or how code is processed should not use this method.
To copy and paste code from GitLab to Databricks:
- Navigate to GitLab.
- Open the file from which the code will be copied.
- Copy the required section of code by highlighting the section, right-clicking and selecting copy.
- Navigate to Databricks.
- Locate the notebook into which the code will be pasted.
- Paste the copied code into the notebook by right-clicking and selecting paste.
Using GitLab with RStudio
RStudio users can interact with GitLab directly from the RStudio console after establishing a connection. However, for certain purposes it may be more convenient to work directly from the GitLab tool.
Connecting to GitLab
Users need to complete a connection process the first time they use GitLab with RStudio. Once established, the setup process is not required for subsequent logins.
The connection process consists of 3 steps:
- Creating an RSA key in RStudio.
- Setting up an SSH Key in GitLab.
- Completing configuration in RStudio.
Creating an RSA key in RStudio
To create an RSA key in RStudio that will allow you to authenticate a new connection:
- Open RStudio.
- Click on Tools.
- Select Global Options.
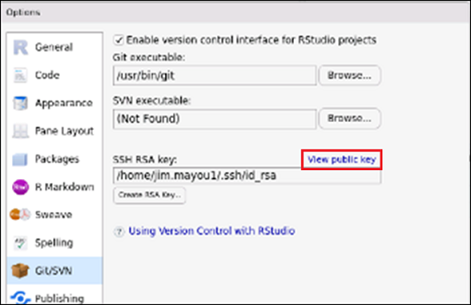
- Click on Git/SVN on the left-hand side of the opened window.

- Ensure the Enable version control interface for RStudio projects checkbox is checked.
- Under the SSH RSA Key heading click on Create RSA Key.

- Fill in a passphrase (optional).
- Click on Create. This will create an RSA key pair.
- Close the window that pops up.
- Click on the View public key link.
- Copy all text in the white box by highlighting, right-clicking and selecting copy.
- Click on Close.
- Click on OK.
Setting up an SSH Key in GitLab
The next step is to setup an SSH key in GitLab that will allow you to generate access credentials.
- Open GitLab.
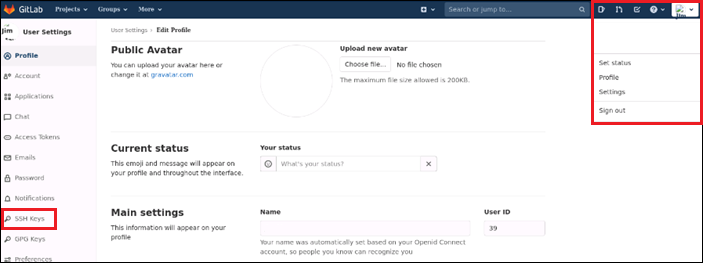
- Click on your username in the top right corner.
- Click on Settings to bring up the following screen.
- Click on SSH Keys.
- Paste the public key (which you created in RStudio) in the Key text area by right-clicking within the field and selecting Paste.
- Type a name for the key in the Title field or leave the pre-populated value.
- Set an expiry date for the SSH key in the Expires at field, if required, or leave blank.
- Click on Add key.
Completing configuration in RStudio
To finalise the setup process:
- Open RStudio.
- Select the Terminal tab on the bottom left-hand side.
- Type the following command and press enter:
git config –-global user.email (email address associated with your DAE account)
- Type the following command and press enter:
git config –-global user.name (your DAE username)
The connection between RStudio and GitLab has now be established.
Cloning a repository
Once you have established your connection with GitLab, you can create a clone repository to start working with code in RStudio.
Cloning a repository is a convenient way of downloading all the code in an existing repository in GitLab to a folder in RStudio.
To clone a GitLab repository:
- Open RStudio.
- Select File.
- Select New Project.
- Click Save on the pop-up screen.
- In the New Project Wizard, select Version Control, followed by Git in the next screen.

Leave the pop-up screens open and proceed to the next step.
You now need to clone the desired project link from GitLab: - Open GitLab.
- Click on the Projects drop-down menu (top left) to search for and click on the required repository.
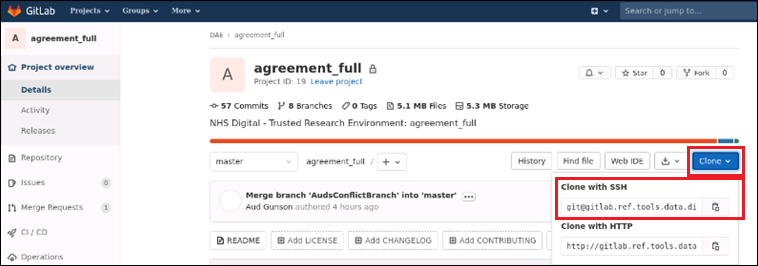
- Click on the blue Clone drop-down menu button.
- From the Clone with SSH section of the Clone drop-down view, click on the Copy URL icon to the right of the address.
You now need to clone the project in RStudio: - Return to RStudio by clicking on the RStudio tab in your browser.
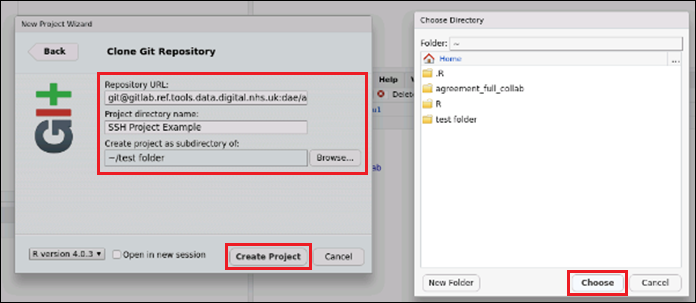
- Right-click in the Repository URL field and select Paste.
- Populate the Project directory name field with the name of the repository or use an alternate name according to your team’s naming convention.
- In the Create project as subdirectory of field, select the subdirectory in which you wish to create your project. You can use the browse button to create a new folder for projects or choose the required directory.
- Click on Choose when the path at the top of the window matches the required directory.
- Click on Create Project.
- When prompted whether you wish to continue, type yes and click on OK.
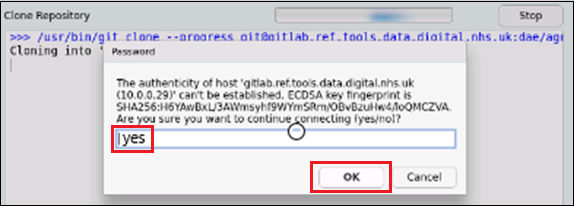
-
If you previously chose to set a password when setting up your SSH key, you will now be prompted to enter it.
- Type your password into the input field and click on OK.
Your cloned project is now available to work with in RStudio and can be found in the Files tab in the bottom right-hand corner of the RStudio main screen.
Agreement restrictions
Users can only move code between RStudio and GitLab when working under the same agreement. By design, the system prevents users from doing this and an error message will be displayed if this is attempted.
Saving changes
RStudio does not automatically save changes, so it is important for users to save regularly using the Save button, including before committing to GitLab.
Committing changes to GitLab from RStudio
Committing changes is the process whereby batches of changes to code are updated in the GitLab depository.
Users have two methods for committing changes to GitLab when using RStudio:
- typing commit commands into the Console - for help on commit commands, type help() into the RStudio console, which will bring up the Help tab, then search for commit
- using the Commit button within the Git tab - this opens a separate screen where commits can be performed
Users are strongly encouraged to use commit commands, rather than the Commit button and Commit screen. This is because users can experience issues when navigating away from the RStudio Commit screen in DAE.

Navigating away from the RStudio Commit screen
The RStudio Commit screen does not provide users with a simple method of returning to the primary RStudio screen.
To return to the primary RStudio screen from the Commit screen:
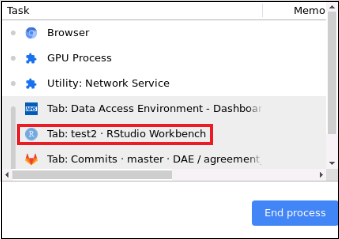
- Press Shift + Escape to bring up the tab navigator.
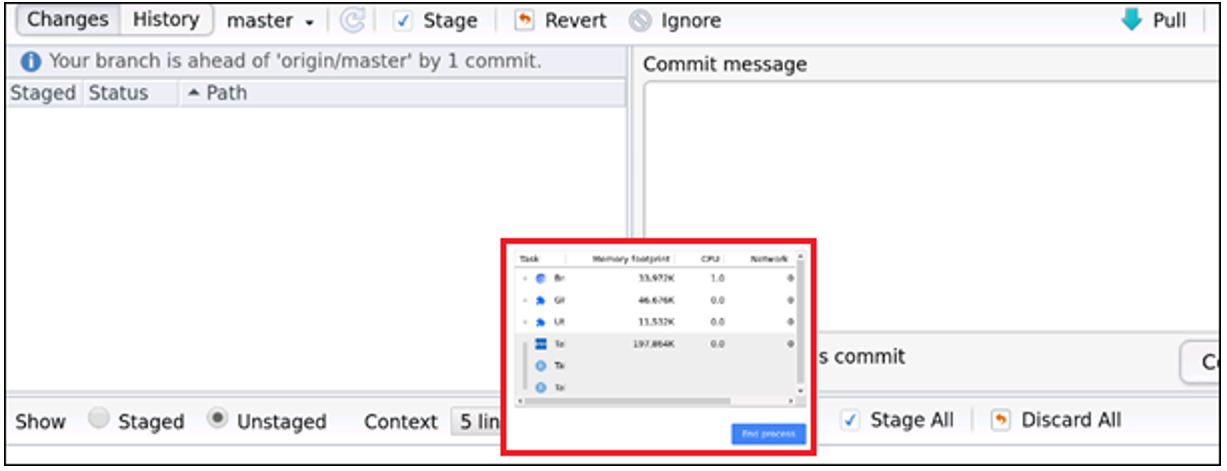
- In the tab navigator, double-click on the tab that corresponds with your RStudio Workbench session.
Ensure you do not click on the other tabs and do not click on the End Process button. Doing so risks ending your DAE session and losing your work.
The primary RStudio screen will be displayed.
GitLab best practice
Do not store any data in GitLab
GitLab is intended for code only. Users must not use GitLab to store any data or results.
For example, before moving a Databricks notebook into GitLab, all results should be cleared using the Clear Results command before transferring.
Frequency of commits
Working practices within teams vary, as do the frequency with which users will want to commit their code to GitLab. As a guideline, users are encouraged to commit code in GitLab at least once a week.
Working together on code
When more than one user is working on the same code, users are advised to create their own branch to work within.
Even where 2 users are ‘pair-programming’ a particular section of code, it is recommended they do so within separate branches. These branches should first be merged into a single branch, and subsequently merged into Master. Doing so will provide greater transparency of any conflicts or errors.
To keep your branch up to date with Master, you can use GitLab’s Merge Request functionality. Rather than having Master as the target branch, simply set it as the source branch, and set your user branch as the target branch. Doing this should achieve the same result as performing a ‘pull’ from Master and should help avoid merge conflicts.

Handling merge conflicts
For detailed guidance, please refer to the merge conflicts page of GitLab Docs.
Various resolution approaches can apply, depending on the details of the conflict. Less experienced users are therefore encouraged to consult with expert users for direction.
Reverting to a previous version of code
For detailed guidance, please refer to the reverting a merge request page of GitLab Docs.
Last edited: 18 April 2024 12:07 pm